

Crochet Flower Coasters
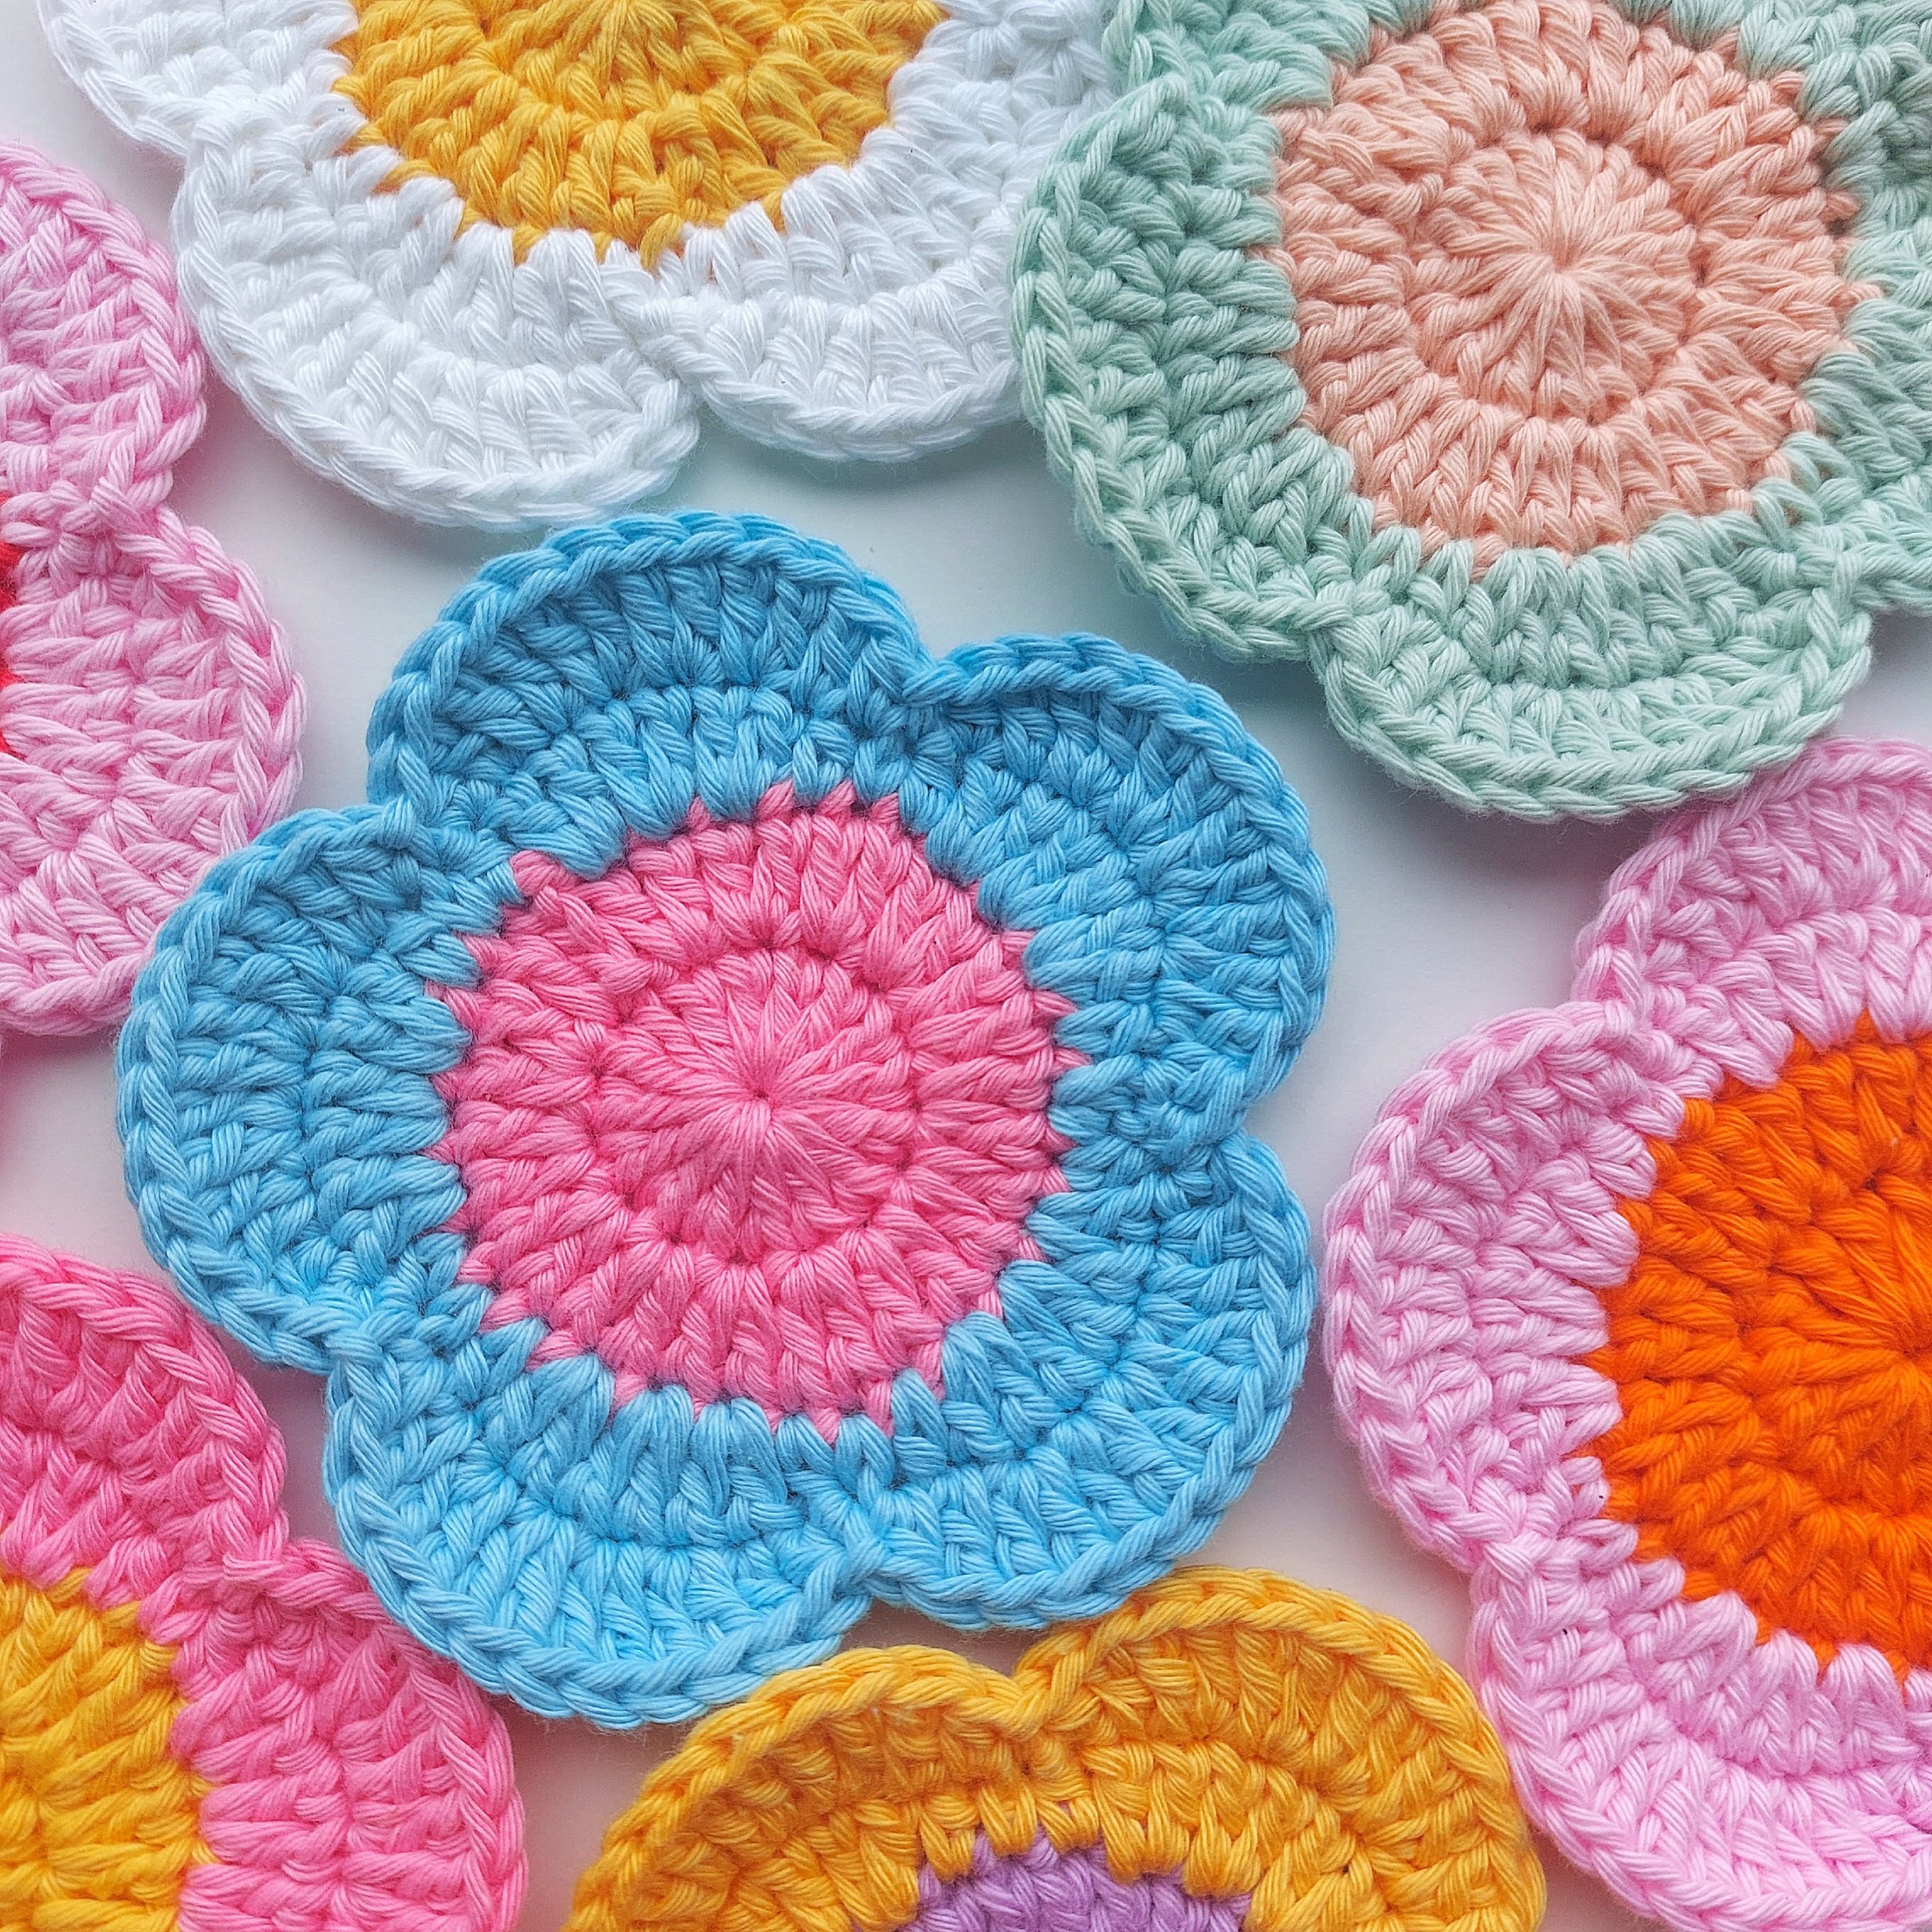
Hello, crochet friends! Thank you so much for stopping by to my vibrant corner of the online world! I'm so thrilled to have you here. Today, I have something fun to share with you - we're going to learn how to make colorful crochet flower coasters!
No matter if you're new to crocheting or have been doing it for years, this pattern is easy and fun for everyone. These coasters aren't just practical, they also bring a burst of colour to any room. As the heart and soul of any cozy home, our handmade coasters, blooming like a flower, will not just protect your beloved furniture from dreaded drink rings, but also infuse a breath of freshness into your living space.

Making your own crochet flower coasters is a great way to add a personal touch to your home. Plus, they make great gifts too! So grab your crochet hooks and your favourite colourful yarns. Let's dive into making these beautiful coasters together.
Keep up the great work, and enjoy your crocheting! And remember, every stitch we make is a stitch closer to bringing more colour and joy into our lives and our homes.
CONSTRUCTION + YARN
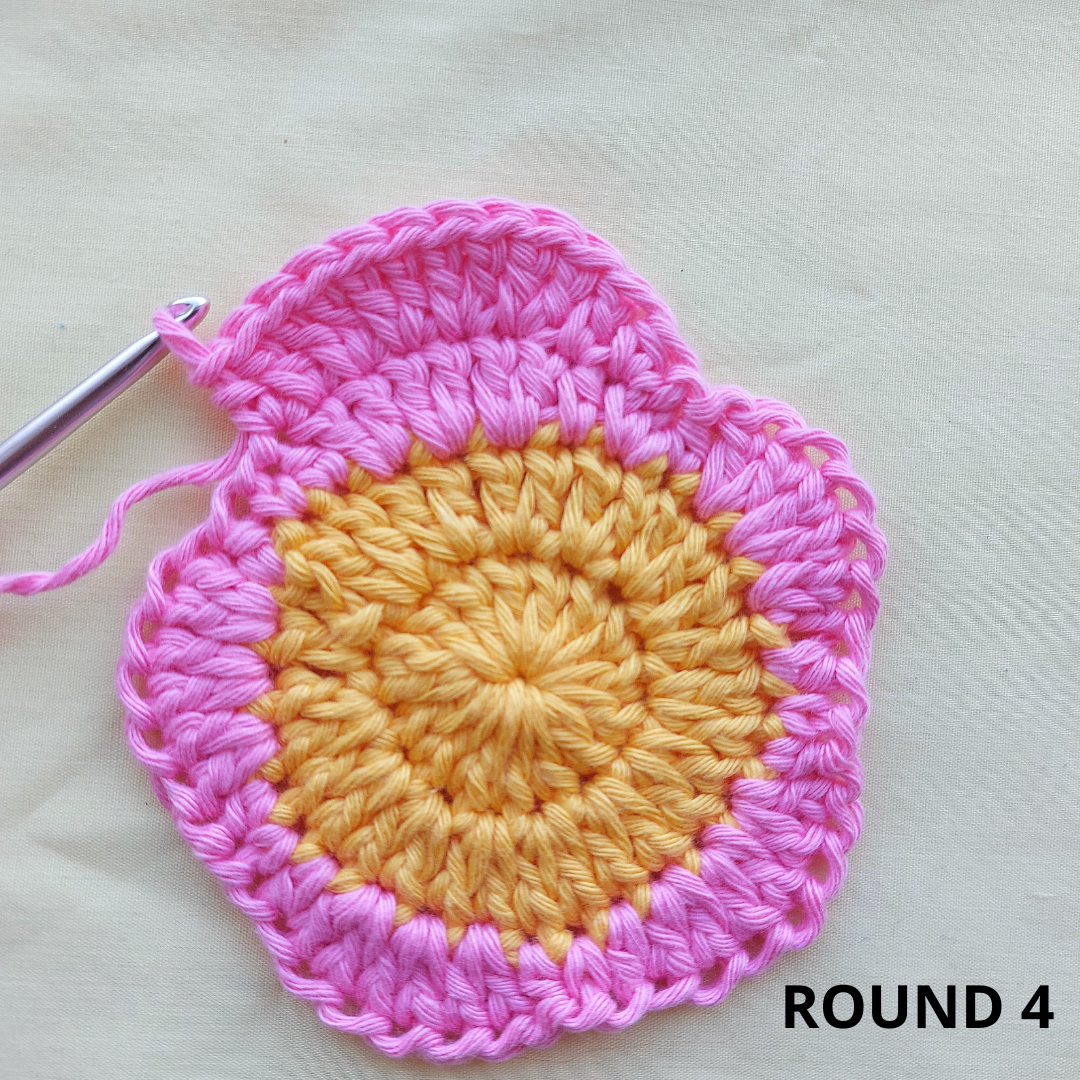
This FLOWER- shaped coaster is worked in the round without turning at the end of each round. You will work 4 rounds in total in order to complete the coasters and the right side of your work will be always facing you.
I highly recommend using cotton yarn to make these coasters as it’s a great material for absorbing water and if you spill your drink and get them dirty you can just wash and dry them and they will look as good as new!
But if you decide to make the flowers and use them just as decorations then you can use any other material you may have at home, like acrylic yarn or even jute.
For this pattern I’ve used category 4- worsted yarn but you can also use a thinner yarn and make smaller flowers to create a garland or if you prefer use super chunky yarn and to make colorful flower cushions. The possibilities are endless!!
You can also use any colour combinations and make them as mine, using two colors or just make them in one colour or if your imagination is running wild mix and match any leftover yarn and create your own colour way for your coasters!
MATERIALS
Any category 4 worsted or ARAN yarn -
I used Paris by Drops- 100 % cotton; 50 gr= 75 m
*Dandelion (14) - color A - 1 ball
* Medium Pink (33) - color B- 1 ball
4.50 crochet hook or size needed to match the yarn you are using. I recommend to go down a size to create a sturdy coaster.
Tapestry needle
Stitch markers
Scissors and Measuring Tape
TENSION OR GAUGE
Each coaster measures approximately 11 cm but tension is not critical for this project
Abbreviations American terms:
Ch- Chain
Ch-sp- Chain space
St/s- Stitch/es
Beg- Beginning
Rnd- Round
RS- Right side
WS- Wrong side
Inc- Increase
Sl st- Slip stitch
Sc- Single crochet
Hdc- Half double crochet
Dc- Double crochet
START HERE
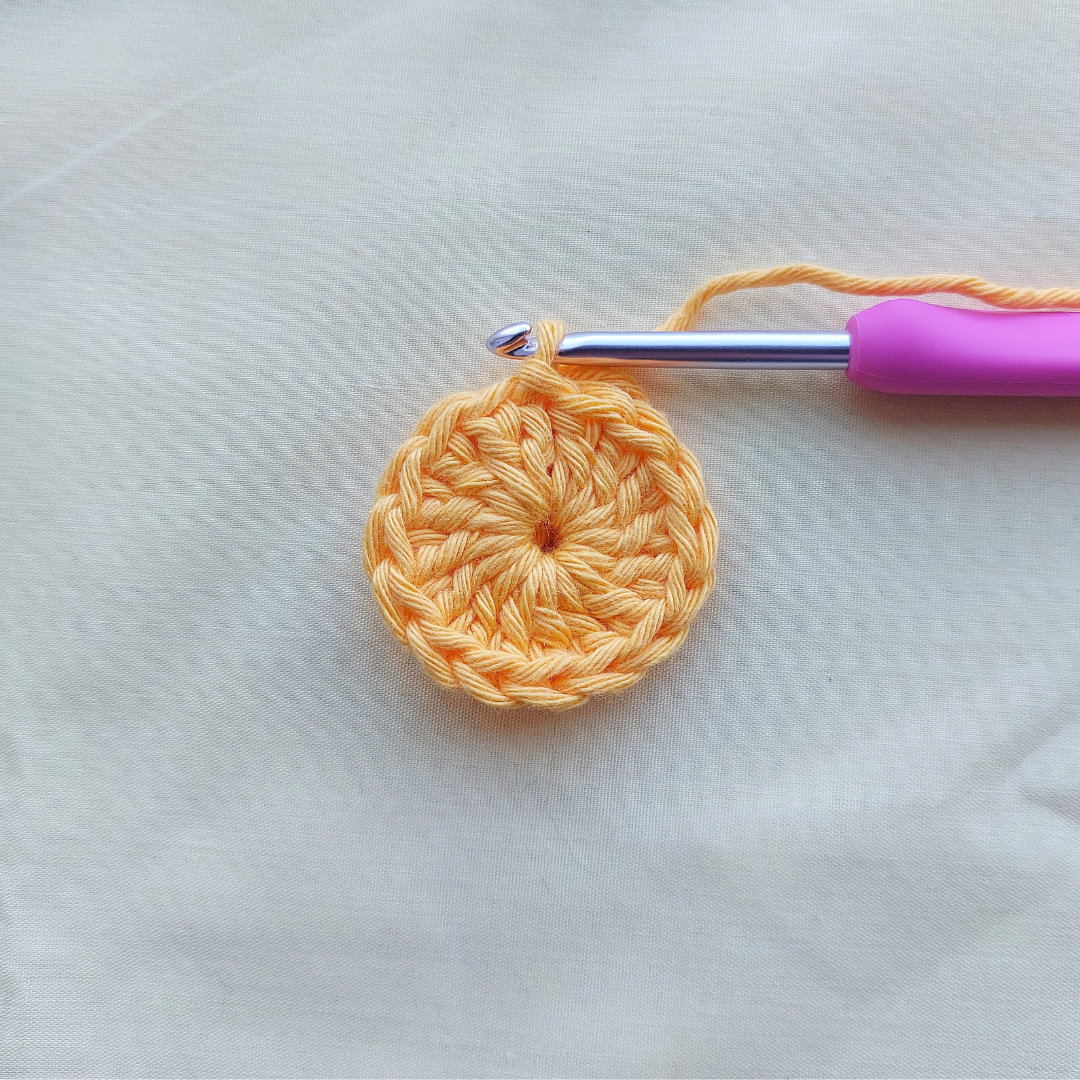
With colour A and 4.50 mm crochet hook
Start by making a magic ring
Working in rounds:
Rnd 1: 2 ch (do not count as a st here an throughout) work 15 dc into the ring, pull the yarn tail to close the ring and sl st to first dc. 15 dc
Rnd 2: 3 ch (count as 1st dc), 1 dc in same space, *2 dc in next st* repeat from * to* until the end of the round, sl st to 3rd ch from intial 3 ch. Fasten off. 30 dc

Attach new colour to any dc from previous round
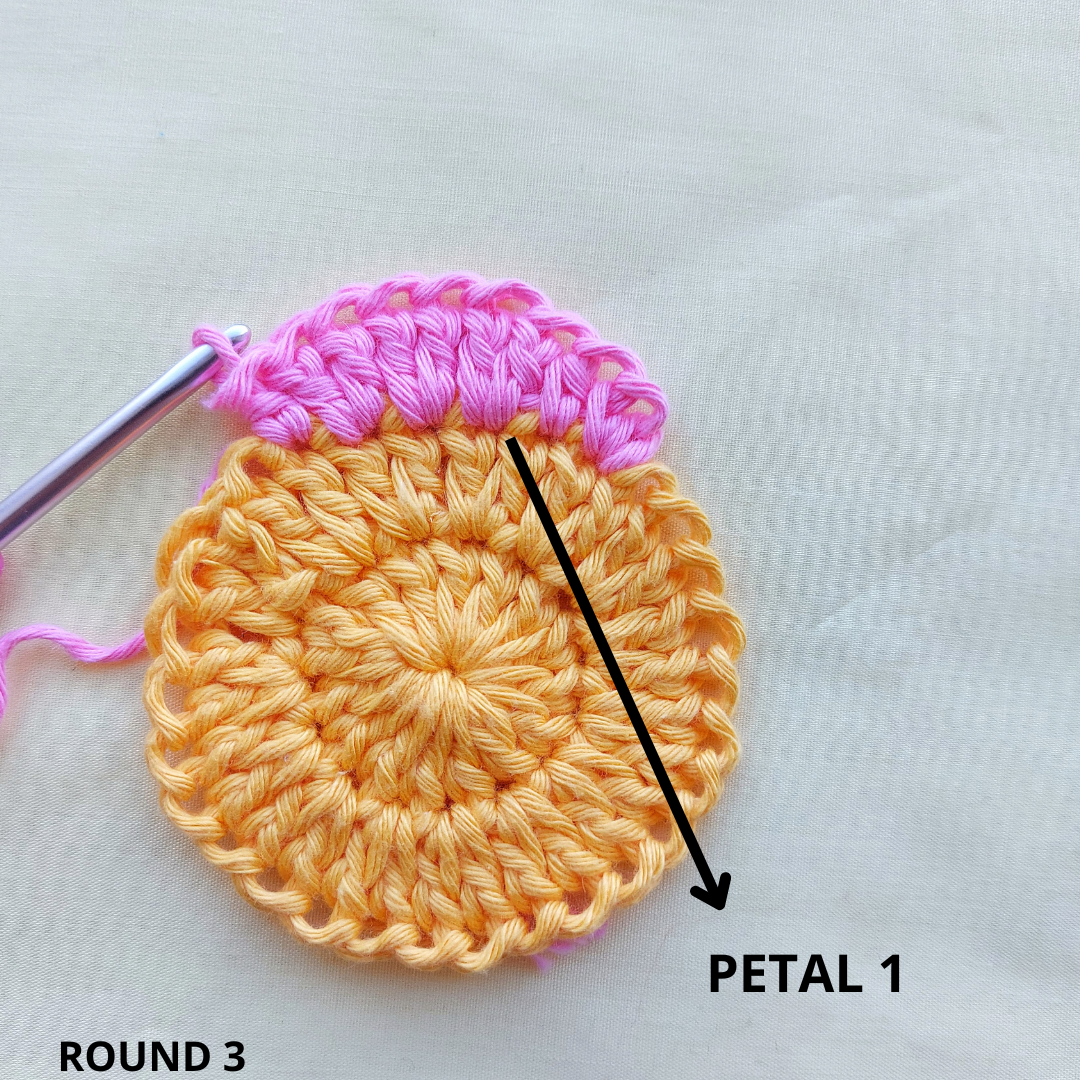
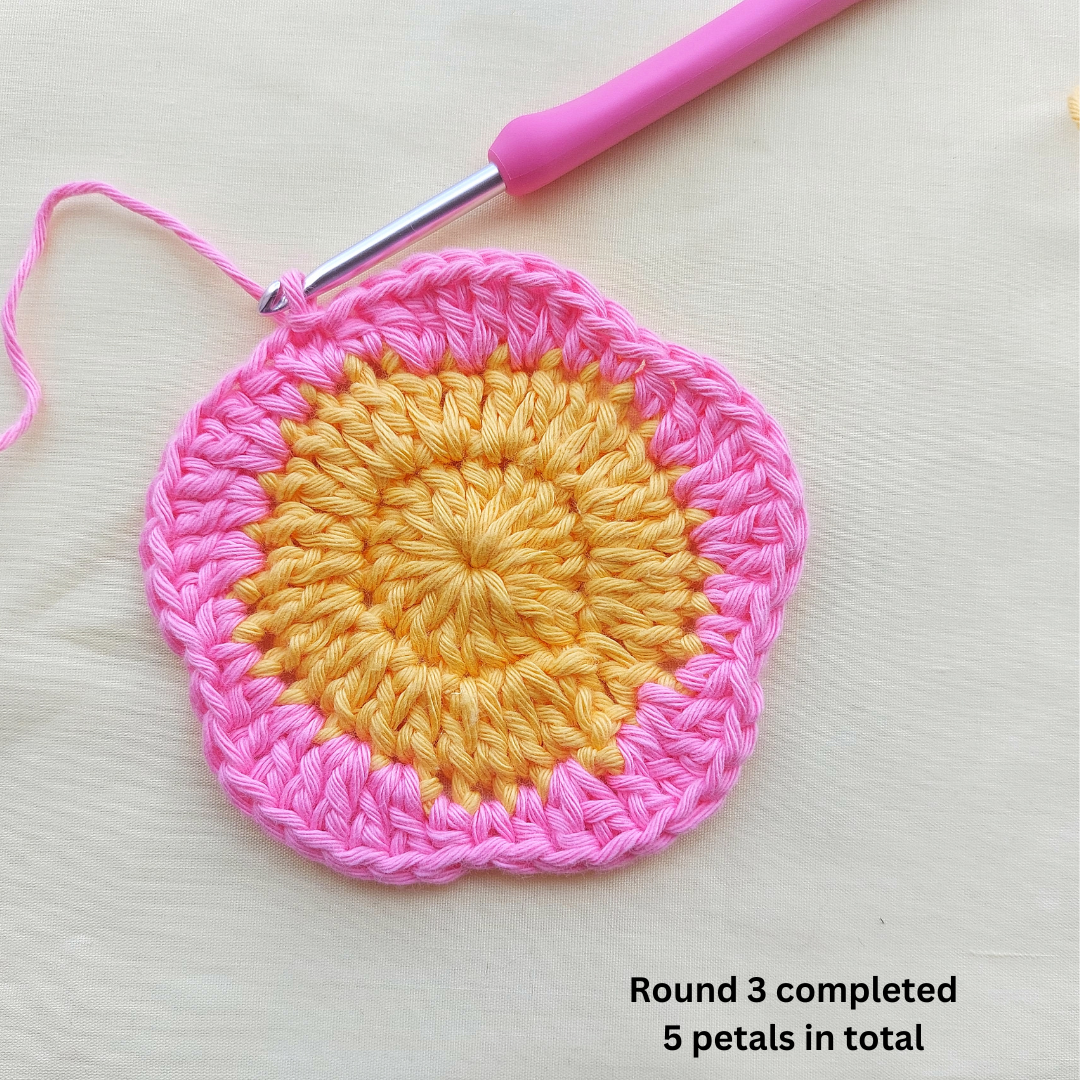
Rnd 3: 1 ch (does not count as a st), [1 sc in same space, 1 hdc in next st, 2 dc in next 3 sts, 1 hdc in next st =first petal created] repeat the steps between [...] four more times, sl st to 1st sc of round. 5 petals 45 sts in total
Rnd 4: Last sl st from rnd 3 counts as 1st st from round 2, 1 hdc in next st, 1 dc, 2 dc in next 4 sts, 1 dc in next st, 1 hdc, [1 sl st, 1 hdc in next st, 1 dc, 2 dc in next 4 sts, 1 dc in next st, 1 hdc] repeat the steps between [...] 3 more times, sl st to join to 1st sl st of round. Fasten off and weave in all the ends. 5 petals 65 sts in total
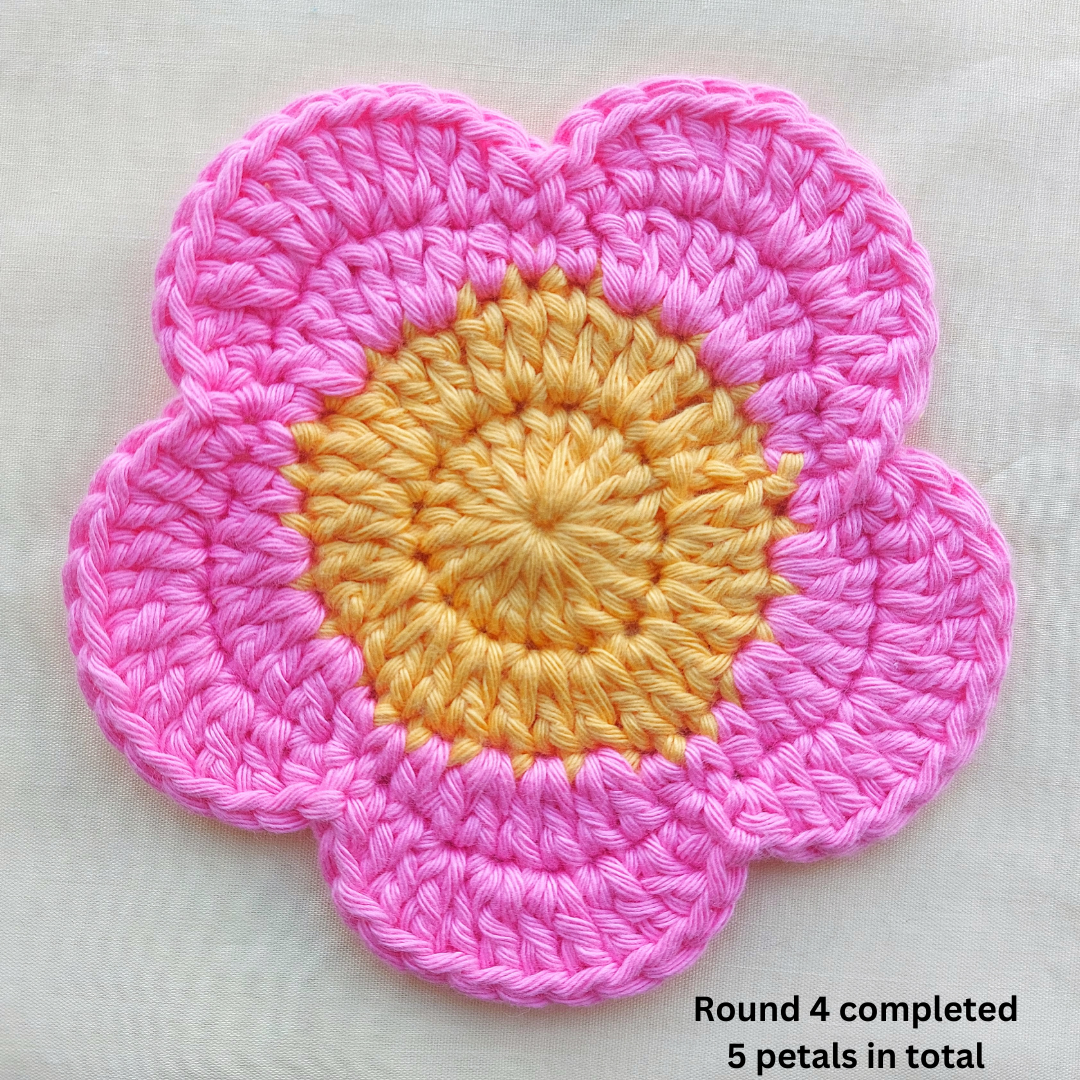
Congratulations! You finished your coasters 😍
How to turn your coasters into a little charm bag or purse?
If you've been keen on crafting something trendy and functional, you're in the right place! Bag charms and small purses are all the rage currently, and what better way to join the trend than by creating your own? Today, I'll be guiding you through the steps to make a delightful flower bag charm or purse using just two flower coasters. Ideal for crochet newcomers and a fantastic solution for utilizing leftover yarn, this project promises both style and satisfaction. Dive in, and soon you'll be flaunting a chic accessory that's entirely your own creation. Happy crocheting!