

Free Granny Square Crochet Sweater Pattern
Crochet Granny Square Pattern
**You can purchase an INEXPENSIVE AD-FREE PDF of this pattern on Etsy HERE . This beautifully formatted PDF includes the step-by-step pictures and is a total of 20 pages including the cover page. Thank you so much for supporting my work :)
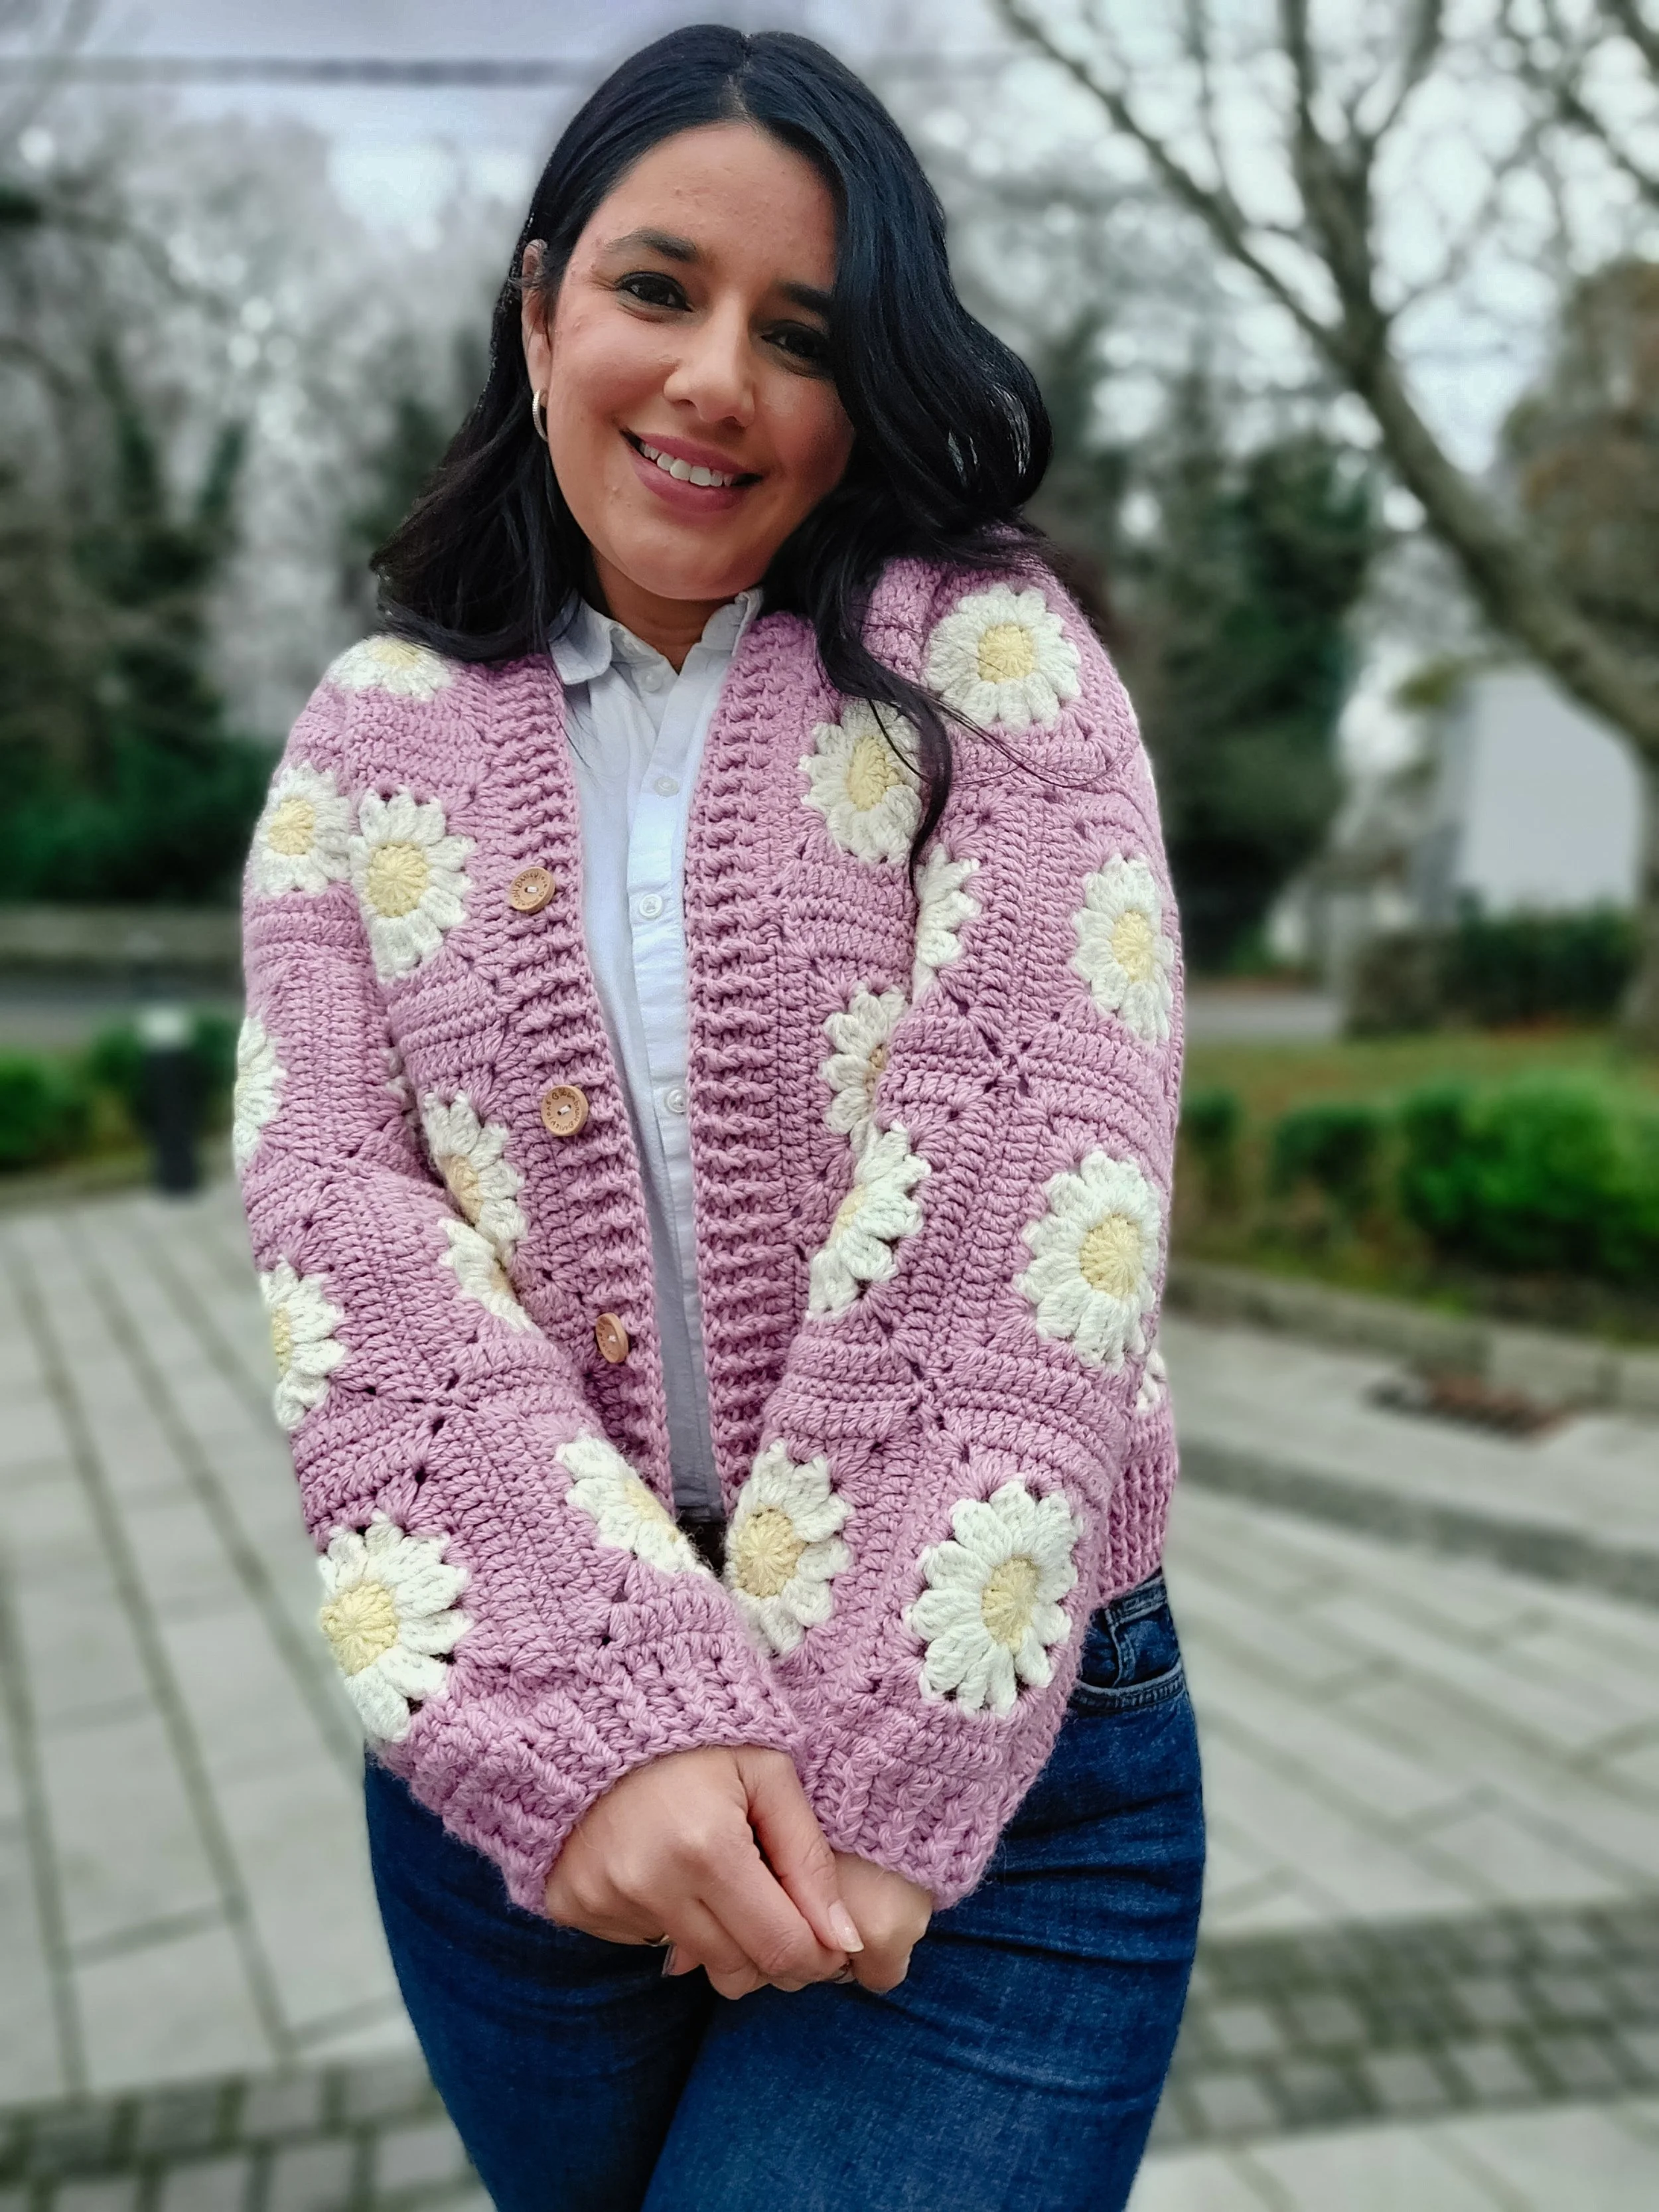
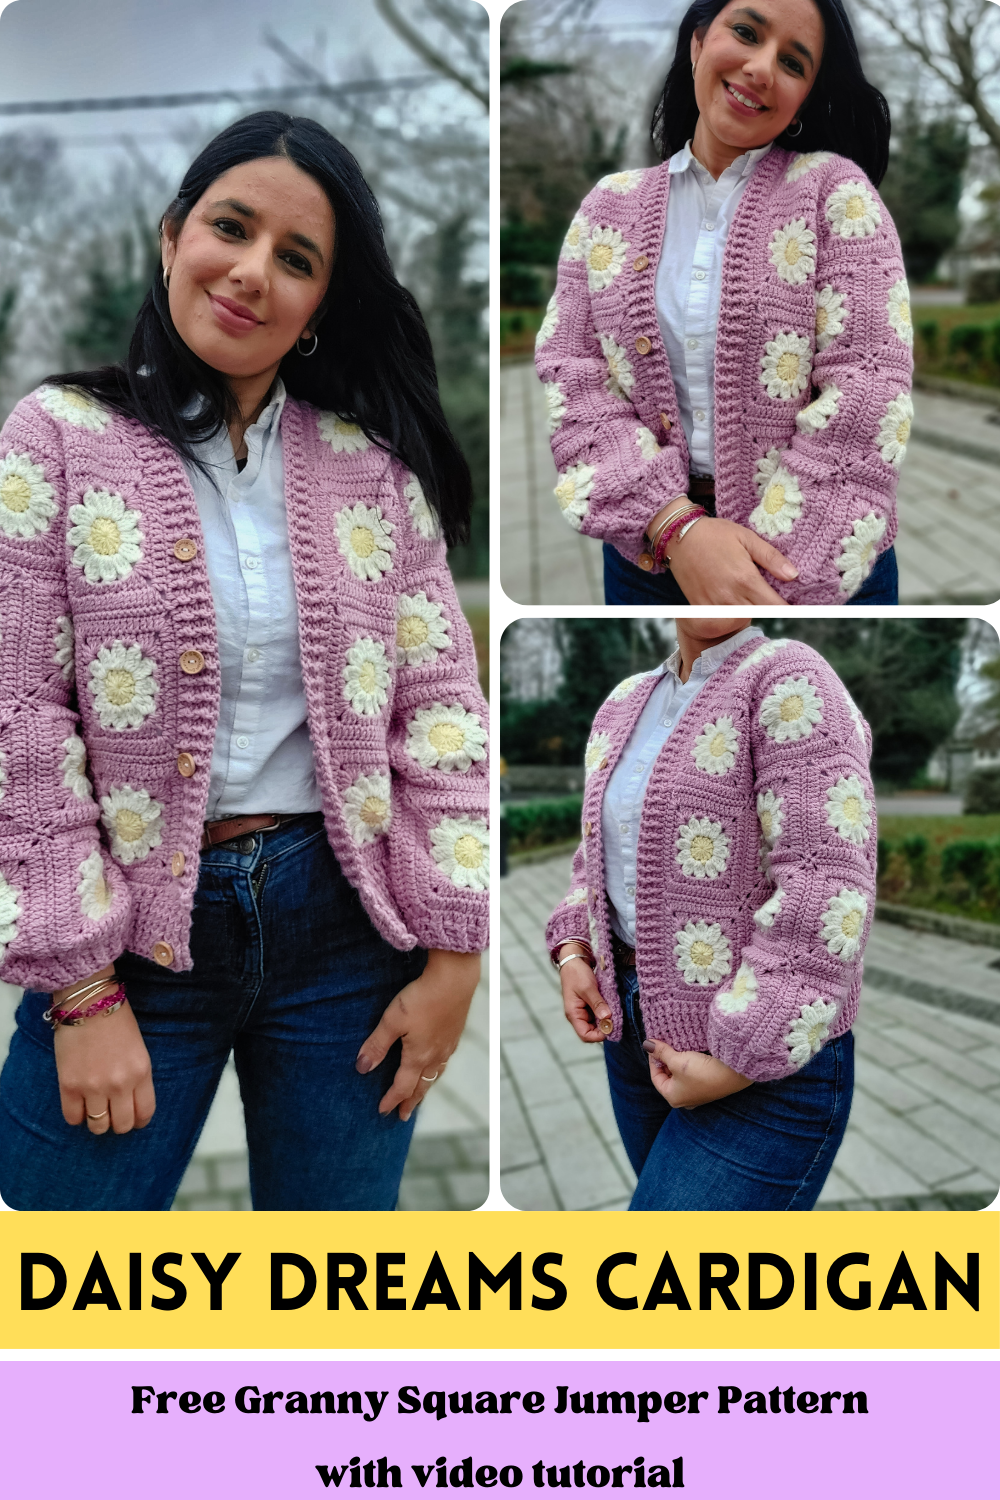
Embrace your love and admiration for flowers and granny squares by combining them together and creating the Daisy Dreams Cardigan.
Welcome to my newest blog post, where I’m so excited to introduce the lovely Daisy Granny Square Cardigan pattern!
Say goodbye to the traditional granny square because this design features pretty daisy motifs, adding a touch of romance and charm to your outfits. Whether you're a crochet newbie or a seasoned pro, this pattern is easy to follow and promises a fun project for everyone. Plus, since it's made entirely from granny squares, you can take your crochet with you wherever you go!
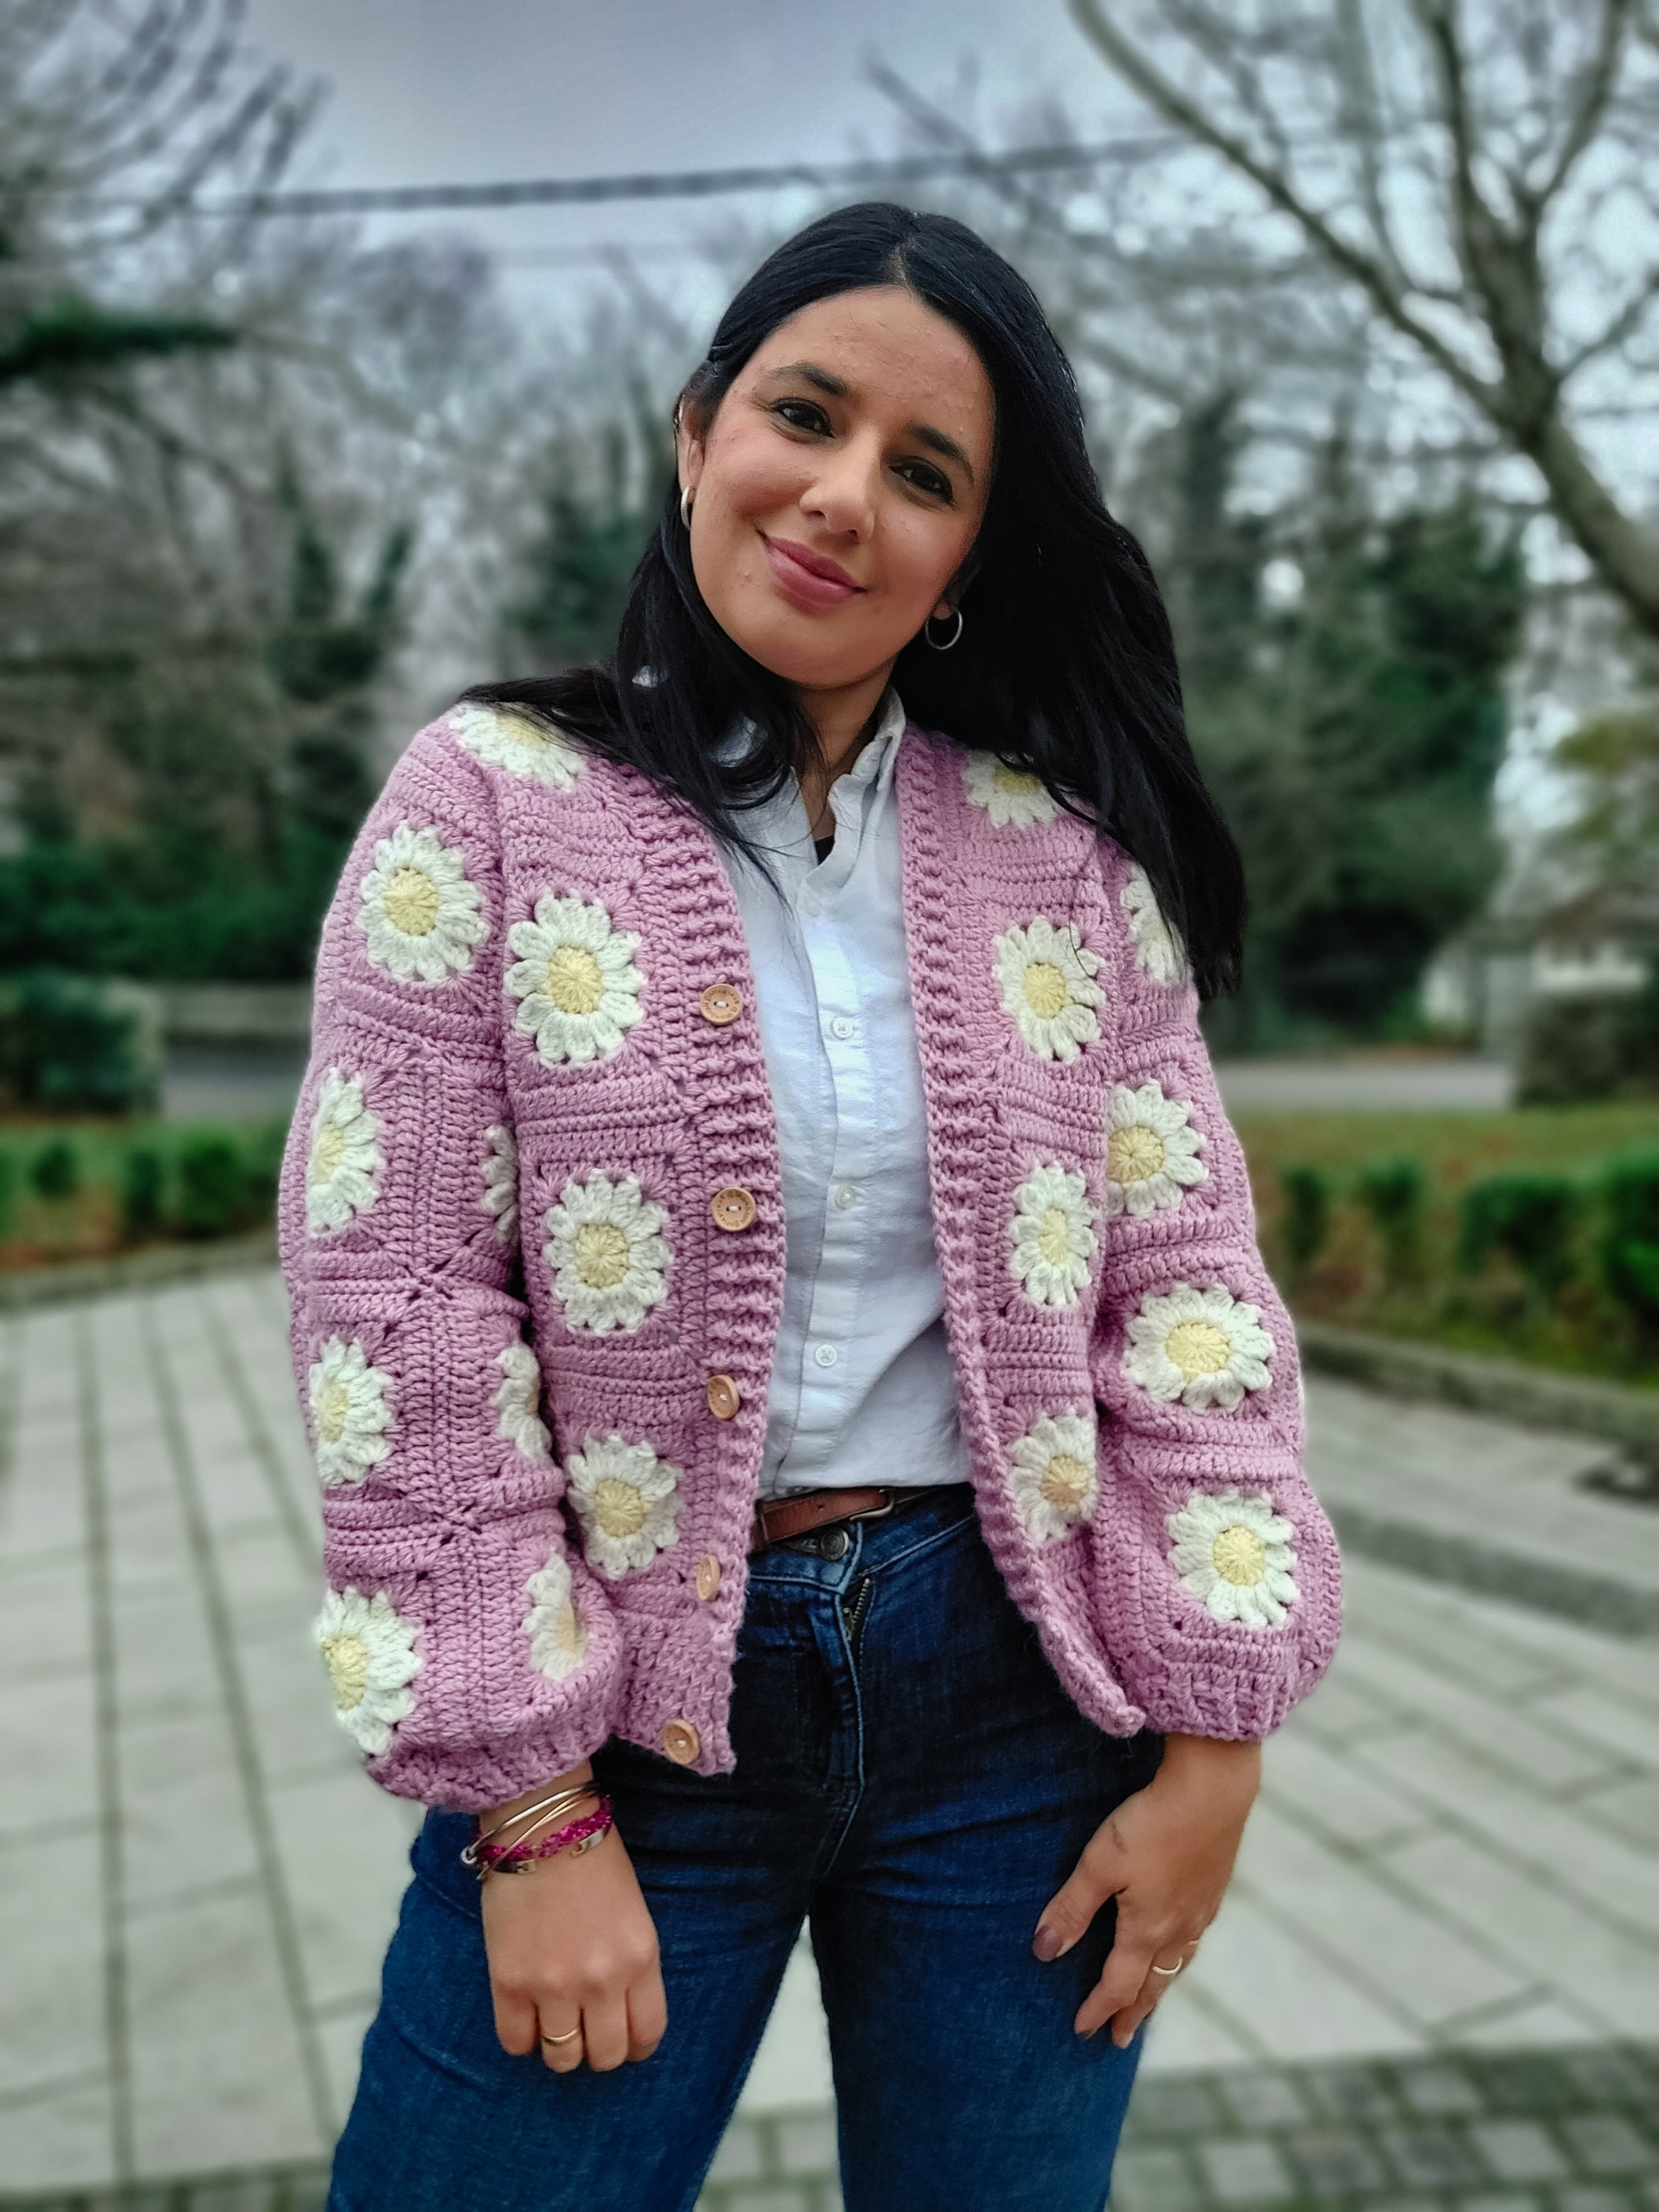
What's great about this cardigan is that you can easily adjust the length by adding or removing squares to make it just right for you. And with sizes ranging from XS to XXL, finding your fit is a breeze.
With cute balloon sleeves and cute buttons, this sweater is not only stylish but also super comfy to wear. So join me as we explore all the details of this adorable cardigan pattern and get ready to create your new favorite piece of handmade clothing!
🩷PRINT AND CROCHET OFFLINE!🩷
Love to crochet on the couch? You can always find a low-cost printable PDF version of all my free patterns. Perfect for printing out or viewing offline on your tablet or phone.This beautifully formatted PDF includes the step-by-step pictures and stitch diagrams for each element of the garland and is a total of 19 pages. The printable pdf is a super useful upgrade that makes it even easier to crochet.
let’s crochet together!
Materials
I first started making this cardigan in winter so when choosing the yarn I went for a mix of Alpaca and Wool. I was looking for a warm and easy to wear cardigan so this was the perfect choice. If you are allergic to wool or you are looking for a spring/summer garment, feel free to use any other material like acrylic or cotton.
You will need:
Any WORSTED or Aran yarn (I used Nepal by Drops; Worsted; 75 m per 50 gr ball; 65% wool, 35% alpaca)
* Lemonade (8919)- colour A- 2 (2, 2, 2, 2, 3) balls
*Off White (0100)- colour B 4 (5, 5, 6, 7, 7) balls
*Medium pink (3270) colour C- 12 (12, 13, 13, 15, 20) balls
5 or 4.5 mm crochet hook or size needed to obtain gauge
Tapestry needle
Stitch markers
Scissors and Measuring Tape
Pattern notes
SIZING
This cardigan is written in 6 different sizes as follows: XS (S, M, L, XL, XXL). Make sure to follow the number for your size only. It is recommended that you go through the pattern and highlight numbers pertaining to your size before beginning.
In order to suit all the sizes above, you will work full squares and half squares for sizes XS, L and XL. This way, you will be able to make a cardigan that has the perfect fit for your body.
CONSTRUCTION
The cardigan is a drop- shoulder design, comprising 5 panels: 2 fronts + 1 back + 2 sleeves. You will first work the necessary amount of granny squares for your size, then you will join them together, using a single crochet seam, to create the different panels and create your cardigan. Finally, you will work a ribbing around the neckline and bottom of the cardigan. As an optional step, you can add buttons.
Make sure you hide the ends of each row as you go, so it will be easier to sew the pieces together at the end.
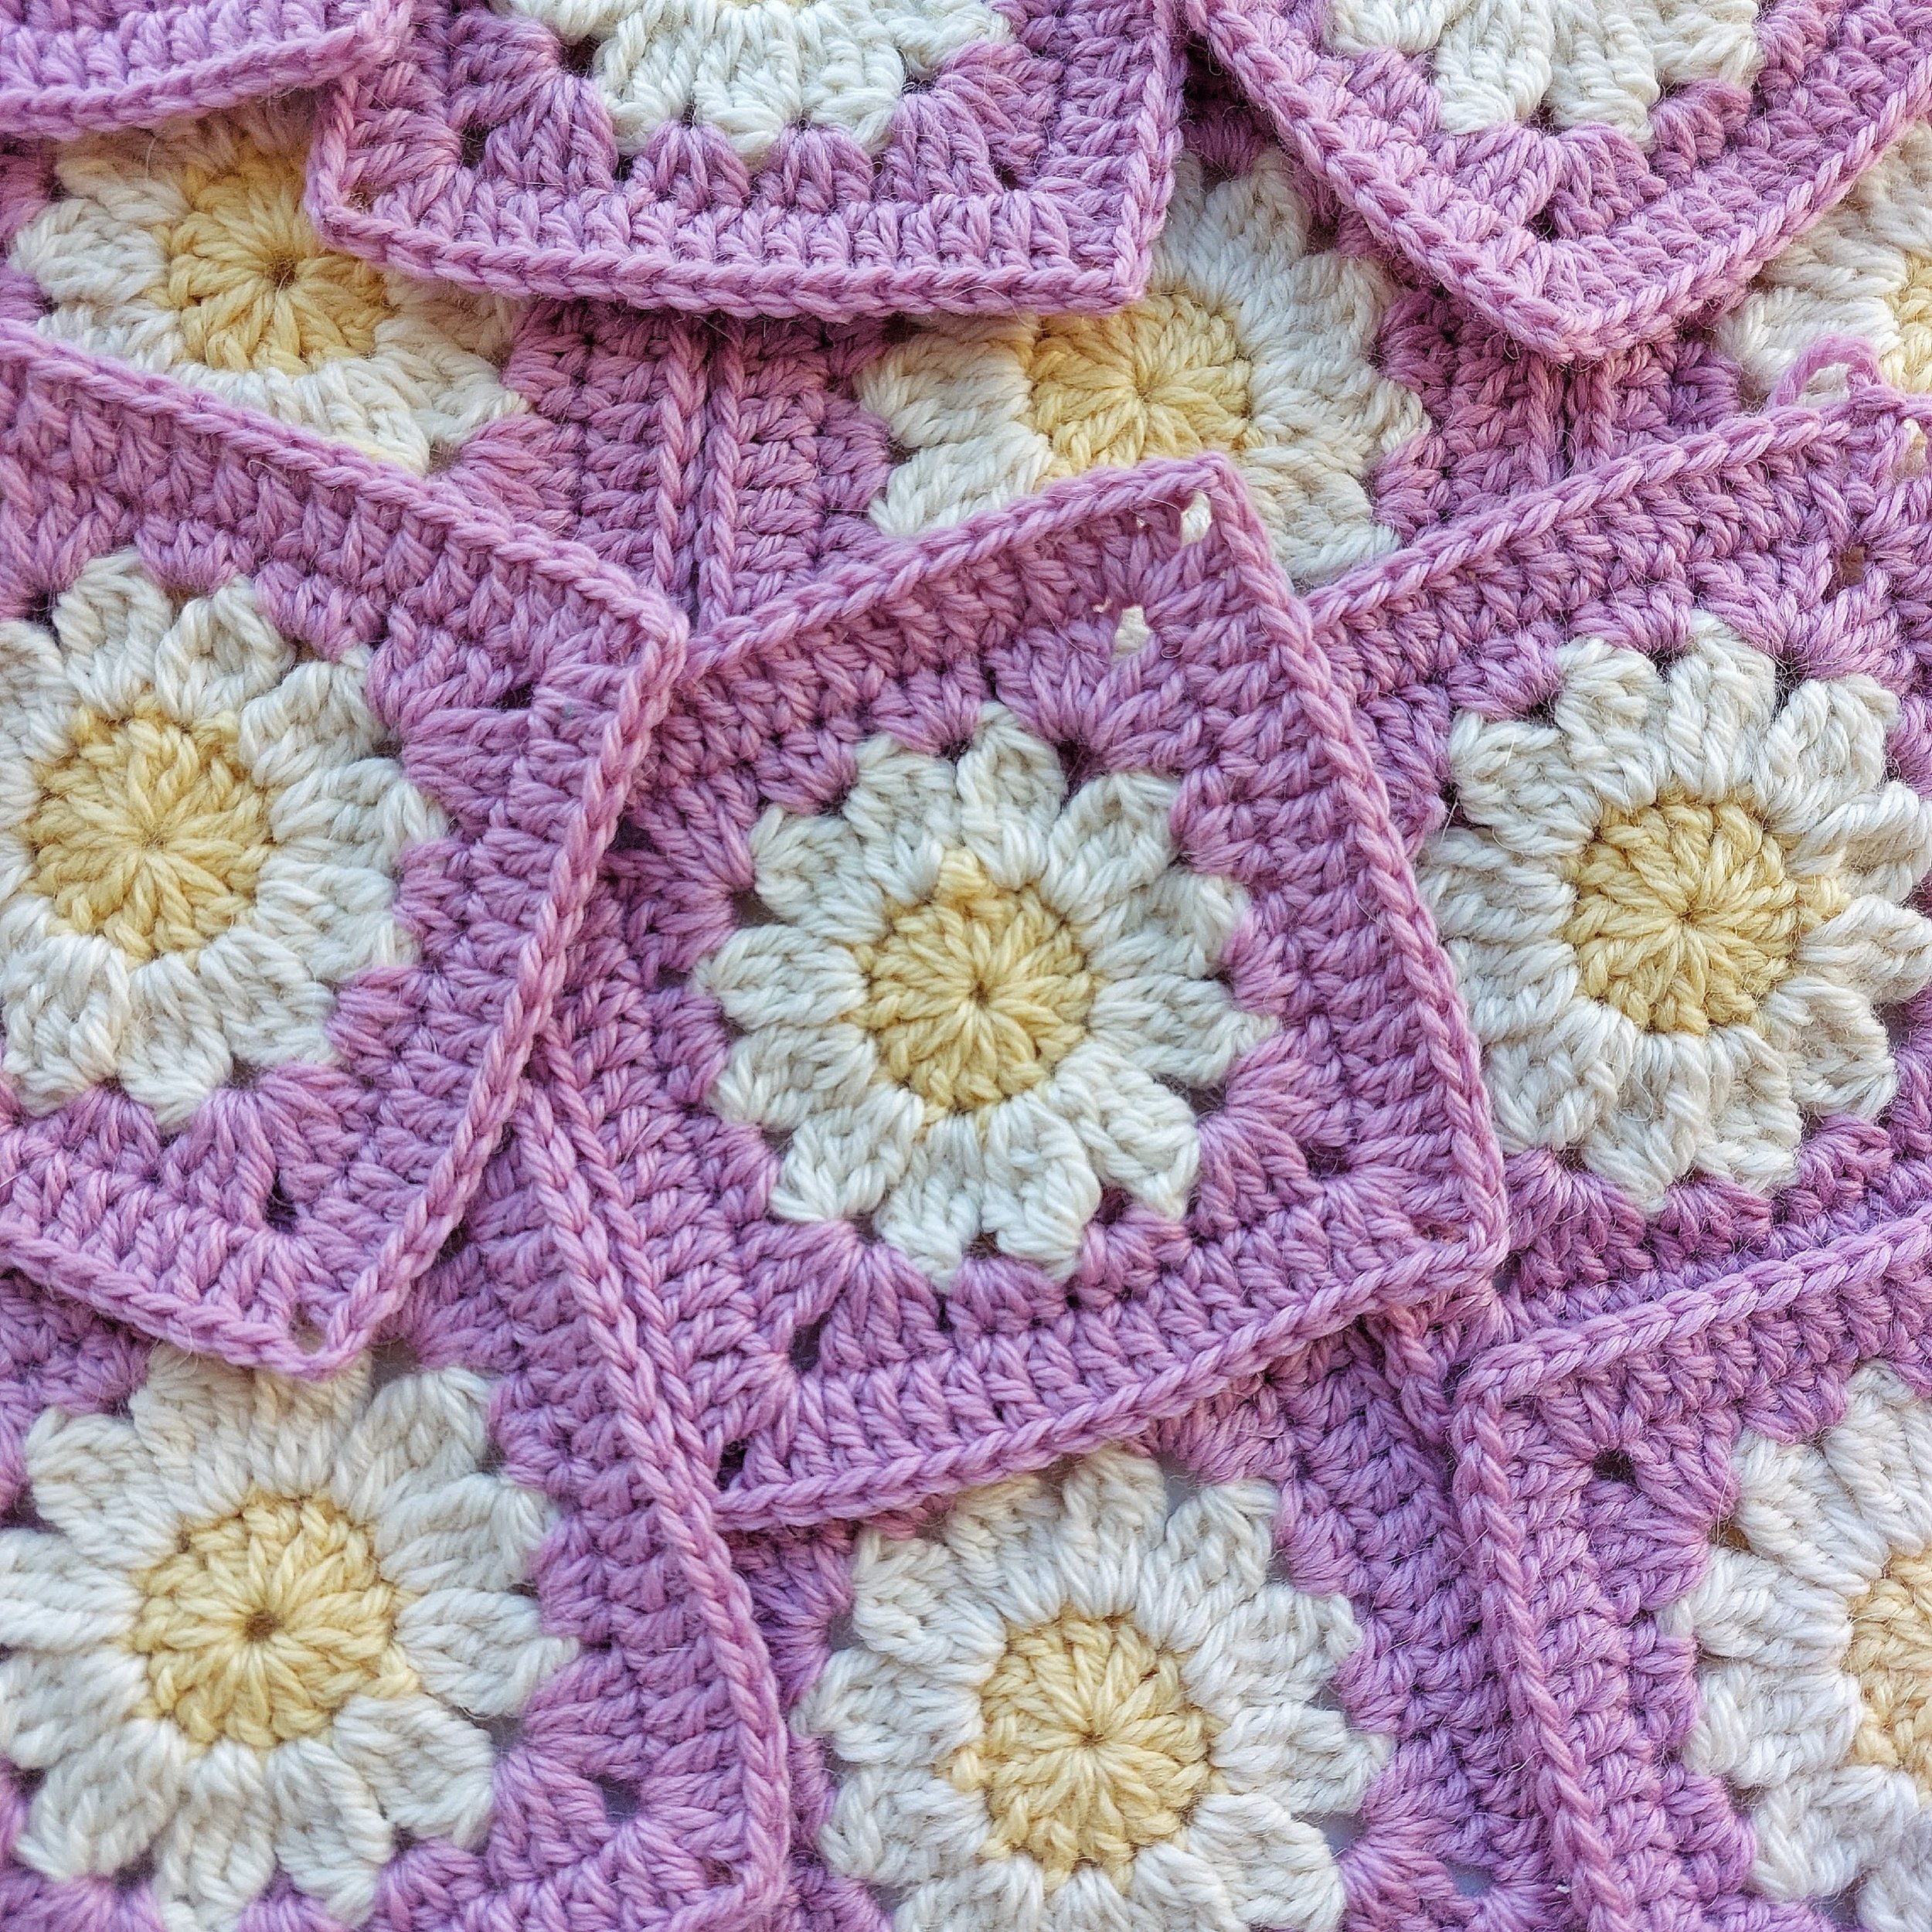
COLOUR WORK
Each granny square is made up in 4 rounds and 3 colours are used: Yellow for the center of the flower, Off-white for the petals and Pink for the last 2 rounds that will create the granny square. Pink will be the main colour for the cardigan and the one used for joining the squares together.
ADJUSTMENTS
You can make your cardigan longer or shorter. Add or subtract squares to the front and back panel. If you decide to make your garment longer, you will need extra yarn.
SPECIAL STITCHES
Tr2tog-Treble 2 together (yarn over twice, insert hook into next stitch, yarn over and pull up loop, yarn over and pull through 2 loops on hook) 3 times, yarn over and draw through all 3 loops.
Tr3tog- Treble 3 together ({yarn over twice, insert hook into next stitch, yarn over, pull, [yarn over, draw through 2 loops] twice} 3 times, yarn over, draw through all 4 loops on hook.
Tension
For Sizes XS, M and XL one square measures 12 cm and half a square measures 6 x 12 cm. I used a 5 mm crochet hook to achieve these measurements.
For sizes S, L and XXL one square measures 11 cm and half a square measures 5.5 x 11 cm. I used a 4 mm crochet hook to obtain a square of 11 x 11 cm.
ABBREVIATIONS
This pattern uses American Crochet Terms (US), and please do not confuse them with British American terms.
Ch = chain
Ch-sp- Chain space
St/s- Stitch/es
Beg- Beginning
Rnd- Round
RS- Right side
WS- Wrong side
Sl st- Slip stitch
Sc- Single crochet
Hdc- Half double crochet
Dc- Double crochet
FPDC- Front post double crochet
BPDC- Back post double crochet
MEASUREMENTS AND SIZES
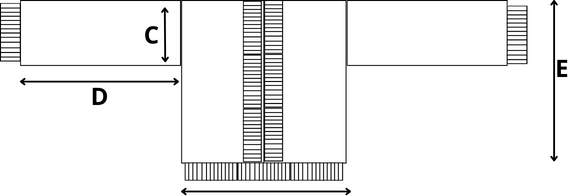
Diagram of measurements to make the granny square cardigan

Follow this chart when choosing your size.
Cardigan is designed to be worn with approx. 20-32.5 cm/7.5 -12.5 inches of positive ease. When choosing a size, find the bust measurement in this chart that equals approx. 20-32.5 cm/7.5 -12.5 inches larger than your actual bust measurement and make this size. For example, model has 93 cm bust and is wearing a size M with finished bust measurement of 120 cm.
Start here
MAKING THE SQUARES
Work each of the squares as follow. With color A and 4 or 5 mm crochet hook.
Start with a magic ring and working in rounds.
Rnd 1: 2 ch (does not count as a st here and throughout), work 12 dc into the ring, pull the yarn tail to close the ring and sl st to first dc. Cut yarn. 12 dc

Round one of daisy granny square.
Attach color B to any dc from previous round.
Rnd 2: 3 ch, tr2tog (3 ch + tr2tog count as 1st tr3tog) into same space, [2 ch, tr3tog in next space] 11 times, 2 ch, sl st on top of tr2tog to close the round. Cut yarn. 12 petals separated by 2ch-sp

Round two of daisy granny square.
Attach color C to any 2ch-sp from previous round.
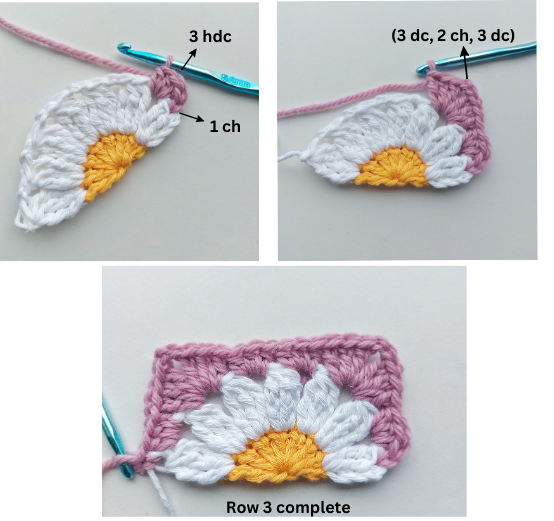
Rnd 3: 3 ch (counts as 1st dc here and throughout), 2 dc in ch-sp from previous rnd, 3 hdc in next 2 ch-sps, [ (3 dc, 2 ch, 3 dc) in next ch-sp, 3 hdc in next 2 ch-spaces] 3 times, 3 dc in last ch-space, 1 ch, 1 sc in 3rd ch from initial 3 ch to close the round. 4 corner spaces separated by 2 groups of 3 hdc

Round three to make a daisy granny square.
Rnd 4: 3 ch, 1 dc in ch-space from previous rnd, 1 dc in next 12 sts, [ (2 dc, 2 ch, 2 dc) in next ch-space, 1 dc in next 12 sts] 3 times, 2 dc in last ch-sp, 2 ch, sl st to 3rd ch from initial 3 ch. 16 dc on each side and 4 ch-sps
Fasten off and weave in all ends. Block each square.

Round four to make a daisy granny square.
making the rectangles
Work each of the half squares as follow:
With colour A and the crochet hook needed to obtain measurements for your size.
Start with a magic ring and working in rows
Row 1: 2 ch (does not count as a st here and throughout), work 7dc into the ring, pull the yarn tail to close the ring. Cut yarn. 7 dc

Row one.
With the RS of your work facing you, attach colour B to 1st dc from row 1
Row 2: 3 ch, tr2tog (3 ch + tr2tog count as 1st tr3tog) into same space, [2 ch, tr3tog in next space] 6 times. Cut yarn. 7 petals

Row two

Row 2 complete.
Attach colour C to 1st tr2tog from row 2
Rnd 3: 1 ch (do not count as a st here), 3 hdc in next ch-sp from previous rnd, (3 dc, 2 ch, 3 dc) in next ch-sp, 3 hdc in next 2 ch-spaces, (3 dc, 2 ch, 3 dc) in next ch-sp, 3 hdc in last 2 ch-sp, 1 sc in last tr3tog from previous row (does not count as a st), 2 ch and turn. 2 corner spaces and 4 groups of 3 hdc in total
Row 3.
Rnd 4: (Initial 2 ch does not count as a st) 1 dc in next 6 dc, (2 dc, 2 ch, 2 dc) in next 2ch-sp, 1 dc in next 12 sts, (2 dc, 2 ch, 2 dc) in last 2ch-sp, 1 dc in next 6 dc. 2 short sides of 8 dc, 1 long side of 16 dc and 2 corner spaces
Fasten off and weave in all ends. Block each rectangle to approximately 12 x 6 cm and 11x 5.5 cm according to your size.

Row 4.
JOINING YOUR SQUARES
Lay out the squares following the schemes below and the corresponding size.


You will need:
Size XS: 12 squares and 8 rectangles for the back, 4 squares and 4 rectangles for each front panel, and 9 squares for each sleeve. 38 squares and 16 rectangles in total.
Size S and M: 20 squares for the back, 8 squares for each front panel and 9 squares for each sleeve. 54 squares in total.
Size L and XL: 25 squares and 10 rectangles for the back, 10 squares and 5 rectangles for each front panel and 24 squares for each sleeve. 69 squares and 20 rectangles in total.
Size XXL: 35 squares for the back, 15 squares for each front panel and 12 squares for each sleeve. 89 squares in total.
HOW TO JOIN YOUR SQUARES
You will first join together all the horizontal rows, and then all the vertical ones. You will start from the top right hand corner and join the squares from right to left. You will use Yarn C and a 4 or 5 mm crochet hook depending on the size you’re making.
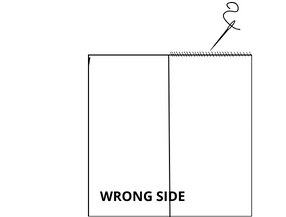
STEP 1: Take first and second square from row 1 and holding RS together (the WS should be facing you), attach yarn through both ch-sps and work 1 ch and 1 sc in same space,

How to attach granny squares.
STEP 2: 1 sc in next 16 sts (make sure you are pulling the hook through both squares to ensure you are joining them together), 1 sc through both ch-sps

How to attach granny squares.
STEP 3: Take the next pair of squares with RS facing together and lean them against the first two squares. Keeping them close together, work 1 sc in the ch-sp, 1 sc in next 16 sts, 1 sc in next ch-sp

How to join granny squares.
When you’ve joined the 2nd pair of squares, take the 3rd pair and repeat the previous steps until you have joined all your squares. Continue joining horizontal rows in the same way until you have joined them all together

How to join granny squares.
You will now be working on the vertical joins. Turn your work 90 degrees, so now the vertical side is horizontally and repeat steps 1 and 2. Once you get to the join of the squares, work 1 ch and continue repeating Step 2, until all the squares are attached.

How to join granny squares.
Repeat the same steps for the following squares and joins, until all your squares are joined.

How to join granny squares.
CHECK FIT
The best thing about making your own garments is that you can make sure they will suit your body and style perfectly.
The measurements given in this pattern are a guideline, as you may require a longer or shorter sleeve depending on your body.
To determine the right length, partially assemble the front and back panels by pinning them together at each corner.
Place the garment on your body and measure from the highest point of the shoulder ‘seam’ to your wrist. If you need to add or remove length, add or remove rows in pattern on the sleeve. The sleeves are designed to reach a little down your wrist, so work the necessary rows to achieve the correct length.
ADDING WIDTH TO THE SLEEVES:
In order to create the perfect sleeve for your cardigan, you will need to work, for certain sizes only, a row of dc around the vertical sides of the sleeve panel. This way you will add a few cm or inches to achieve the right measurement for each size.
SIZE XS, L and XL - Omit this step
Size S, M and XXL- Repeat these steps for the two sleeves.
With 4 or 5 mm (according to your size) crochet hook.
With RS of sleeve panel facing you, attach colour C to any corner space. Working in rows.
Row 1: 3 ch (count as 1st dc) in corner space, [1 dc in next 16 dc, 1 dc in next ch-sp, 1 dc in join between squares, 1 dc in next ch-sp] 3 times, 3 ch and turn. 56 dc
This is the end row for size M. For size S and XXL continue with the next row.
Row 2: 1 dc in each dc from previous row. 56 dc
Fasten off and weave in ends
Repeat the same steps and rows on the opposite side of the sleeve panel.
making up your cardigan
Place your front panel on top of our back panel with the right sides touching. Using a yarn needle and colour A, whip stitch along shoulder seams. Repeat this once more to attach the second panel.
Fold your first sleeve in half so the long edges meet, and locate the centre point at the top edge-, line this up with the shoulder seam of the body so the right sides are together.
Use colour A and whip stitch to attach the sleeve to the body.
Repeat steps 2 and 3 for the other sleeve.

Fold the cardigan along the shoulder edge so that the wrong sides are touching and sew the underarm and side seams using colour A and a tapestry needle.

Front Border and Neckline
ALL SIZES
With RS of cardigan facing you, attach colour C to bottom corner space of right side panel and working in rows with a 4 or 5 mm crochet hook.
We’ll start working on the border of the cardigan:
Row 1: 3 ch (count as 1st dc) in corner space, 1 dc in same space [1 dc in next 16 dc, 1 dc in next ch-sp, 1 dc in join between squares, 1 dc in next ch-sp] 3 (3, 3, 4, 4, 5) times, 1 dc in next 12 sts,
The following steps will create the neckline:
1 hdc in next 4 sts from the front panel, 1 sc in next 2 ch-spaces available, 1 sc in next join from shoulders, 1 sc in next ch- space, 1 sc in next 16 sts from the neck, 1 sc in next ch-sp from neck, 1 sc in next join from shoulder, 1 sc in next 2 ch-spaces available, 1 hdc in next 4 sts from front panel,
Now, we’ll continue working on the border:
1 dc in next 12 sts, 1 dc in next ch-space, 1 dc in join between squares *1 dc in next ch-space, 1 dc in next 16 dc, 1 dc in next ch-space**, 1 dc in join between squares* repeat from * to * 2 (2, 2, 3, 3, 4) more times ending last repeat at **, 1 dc in last ch-space, 3 ch and turn.
On this row, we’ll create the ribbed band of the border and this ribbing won’t be worked on the neckline:
Row 2: 1 dc in 1st st, *1 FPDC in next dc, 1 BPDC in following dc* repeat from * to * until you reach the 1st hdc of the neckline,
Neckline:
1 hdc in next 4 hdc, 1 sc in next 24 sc from, 1 hdc in next 4 hdc,
Border:
*1 FPDC in next dc, 1 BPDC in following dc* repeat from * to * until there’s one dc left, 1 dc in last dc, 3 ch and turn.
Rows 3 to 5: Repeat row 2.
Fasten off and weave in ends.
Bottom Border:
With the RS of your work facing you, attach yarn C to right bottom edge.
With 4 or 5 mm crochet hook and working in rows.
Row 1: 3 ch (count as 1st dc), evenly distribute 6 dc along the border of the front panel (this will be the FPdc and BPdc lying horizontally), work 1 dc in each st available, in each ch-sp and join between squares until you reach the border of the opposite side, evenly distribute 7 dc, 3 ch and turn.
Row 2: *1 FPDC in next dc, 1 BPDC in following dc* repeat from * to * until there’s one dc left, 1 dc in last dc (this will be the initial 3 ch from previous row), 3 ch and turn.
Rows 3- 4 (8, 7, 5, 4, 9): Repeat row 2.
Fasten off and weave in ends.
Sleeve Cuffs
With a 4 or 5 mm crochet hook and colour C, attach yarn to bottom edge of sleeve in seam.
Working in rounds.
Work over each st, corner space, join and double crochet lying horizontally from adding width to the sleeve.
Rnd 1: 2 ch, 1 dc in next space (2 ch+ 1 dc count as 1 dc2tog), 1 dc2tog across, sl st to 1st dc2tog of round. 28 (32, 30, 38, 38, 42) sts
Rnd 2: 2 ch, *1 FPDC in next dc, 1 BPDC in following dc* repeat from * to * across, sl st to 1st st. 28 (32, 30, 38, 38, 42) sts
Rnds 3 to 6 (9, 6, 10, 7, 10): Repeat row 2
Cut yarn and weave in ends.
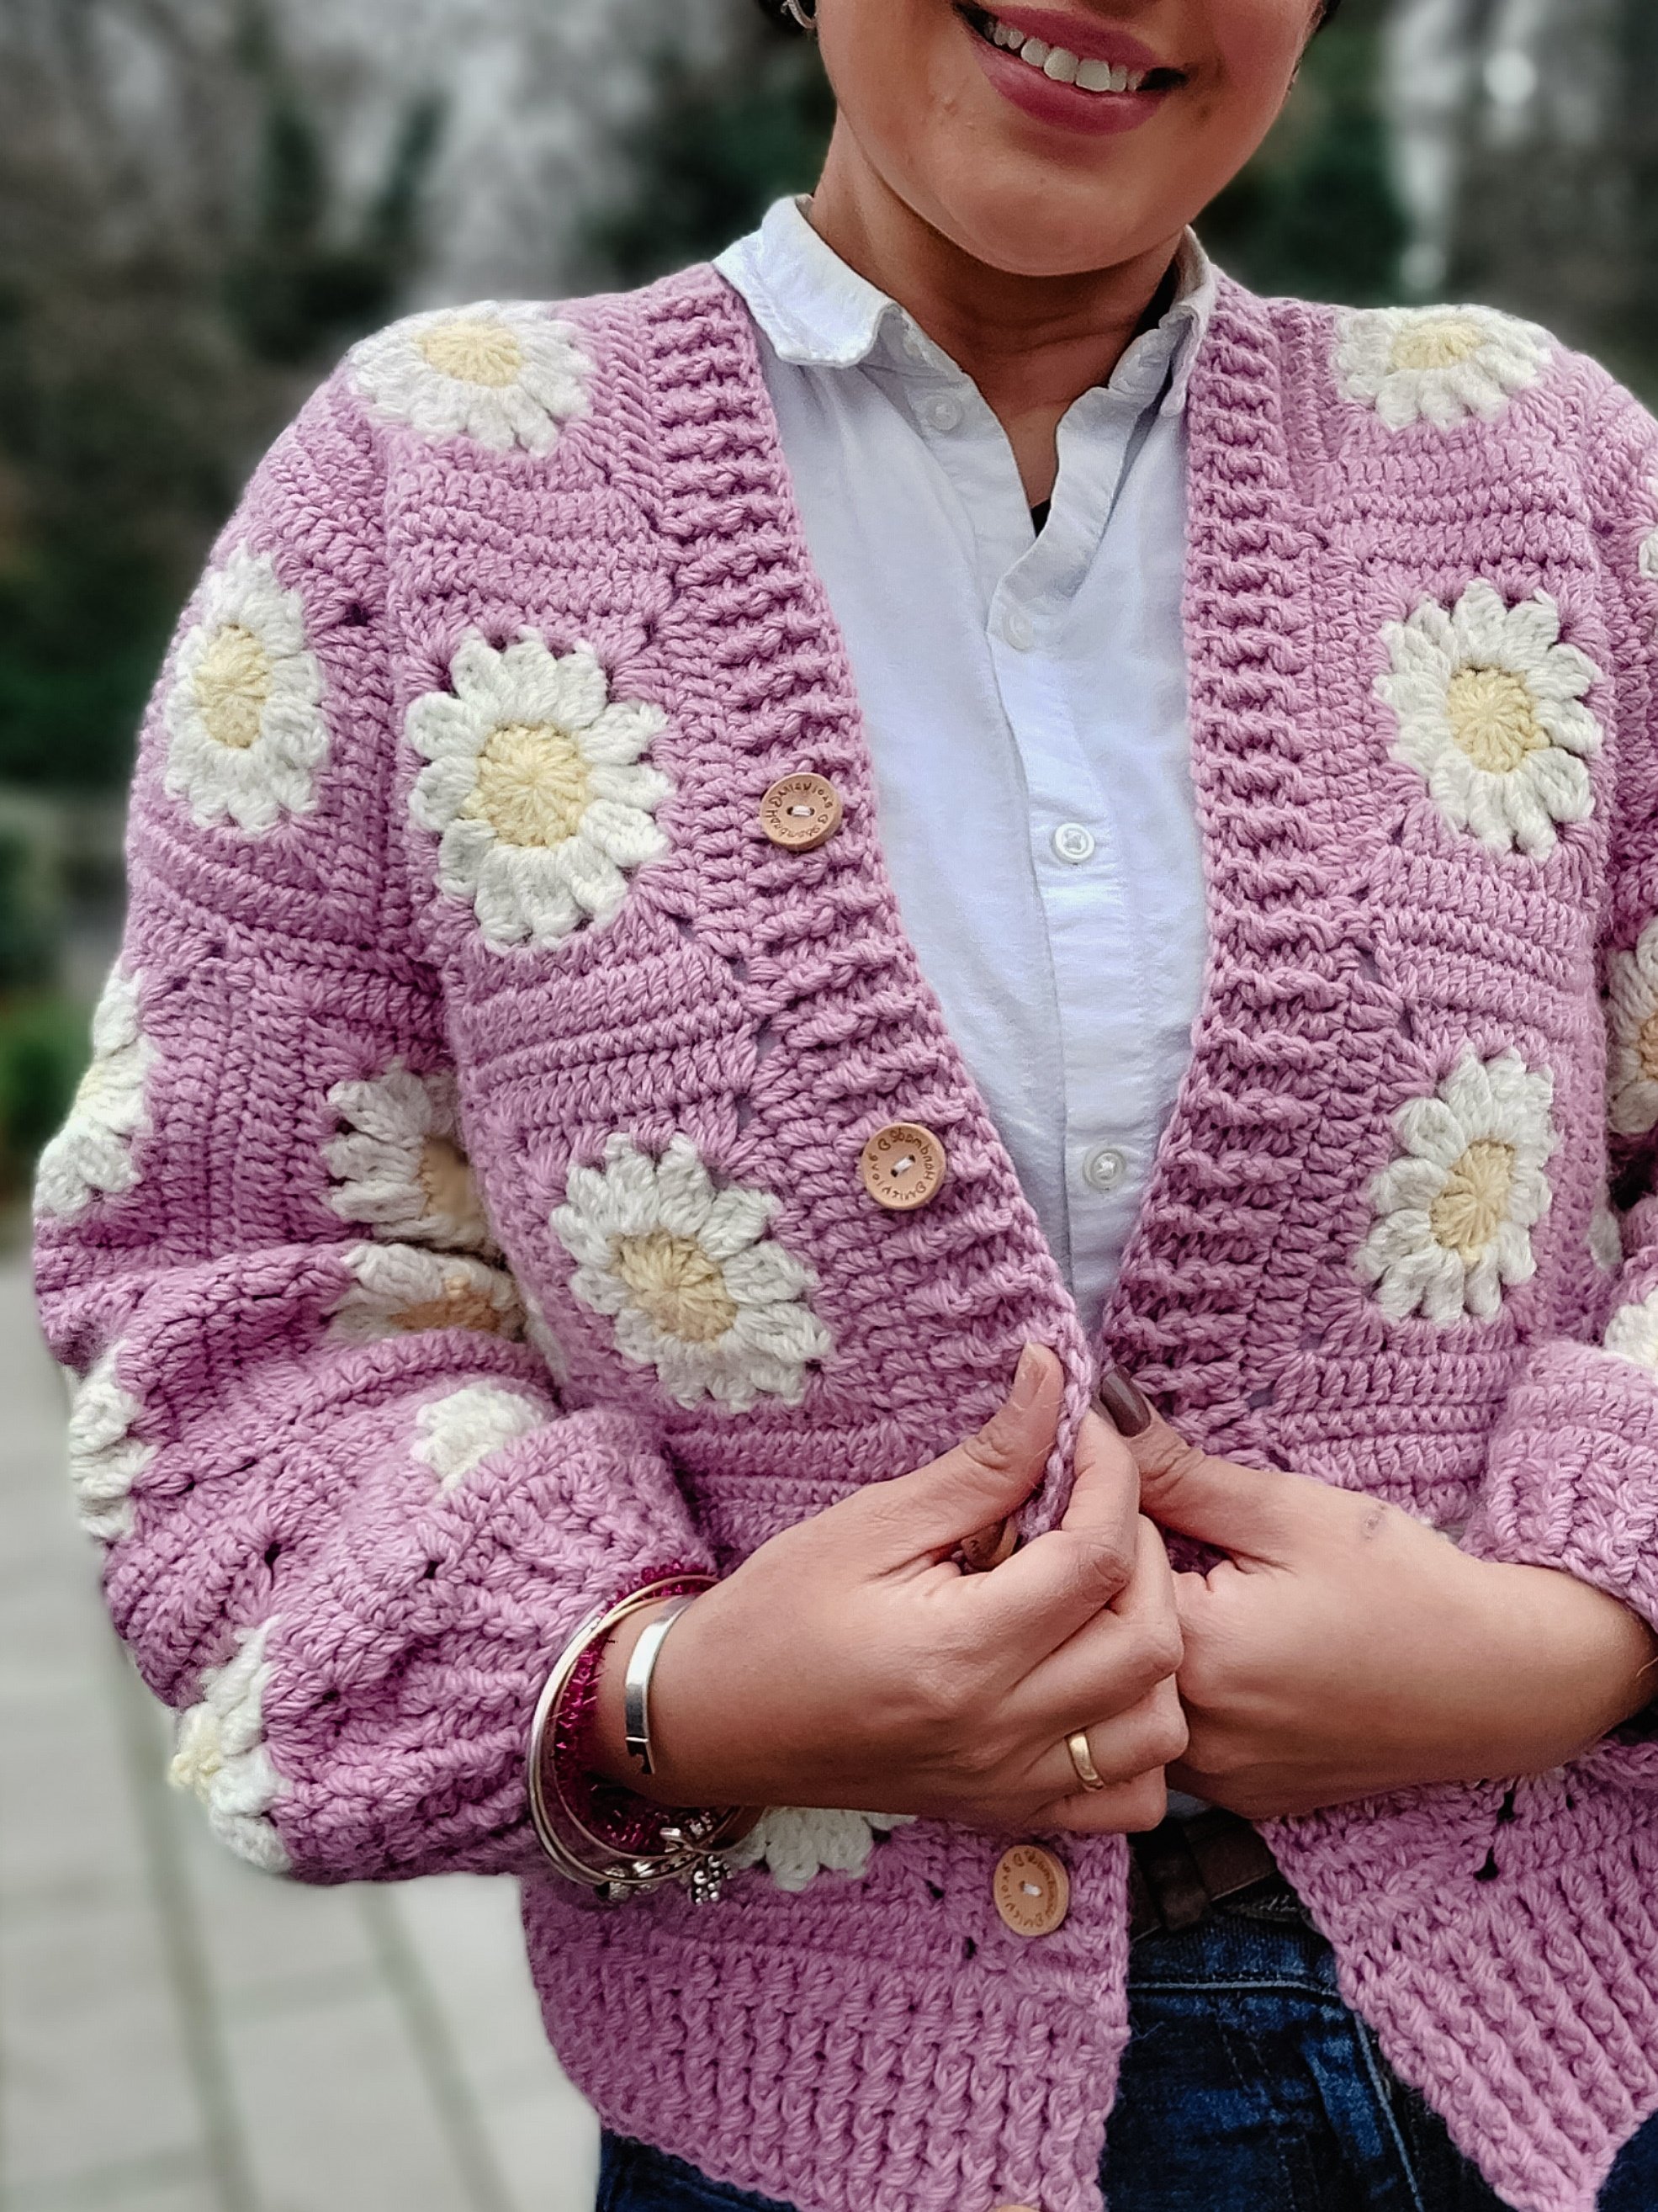
BUTTONS
Starting on the bottom, evenly space 5 buttons across the left side ribbing of your cardigan, until you reach your chest. This will give a V-neck shape to your work. You won’t need to create button holes as the spaces from the ribbing can be stretched enough to insert the buttons.

PIN ME FOR LATER
I really hope you enjoy this pattern and I would love to see your work!
Tag me on Instagram @leonela.diy