Shell Stitch Crochet Top Pattern
**You can purchase an INEXPENSIVE AD-FREE PDF of this pattern on Etsy HERE . This beautifully formatted PDF includes the step-by-step instructions and pictures to help you along the way. Thank you so much for supporting my work :)
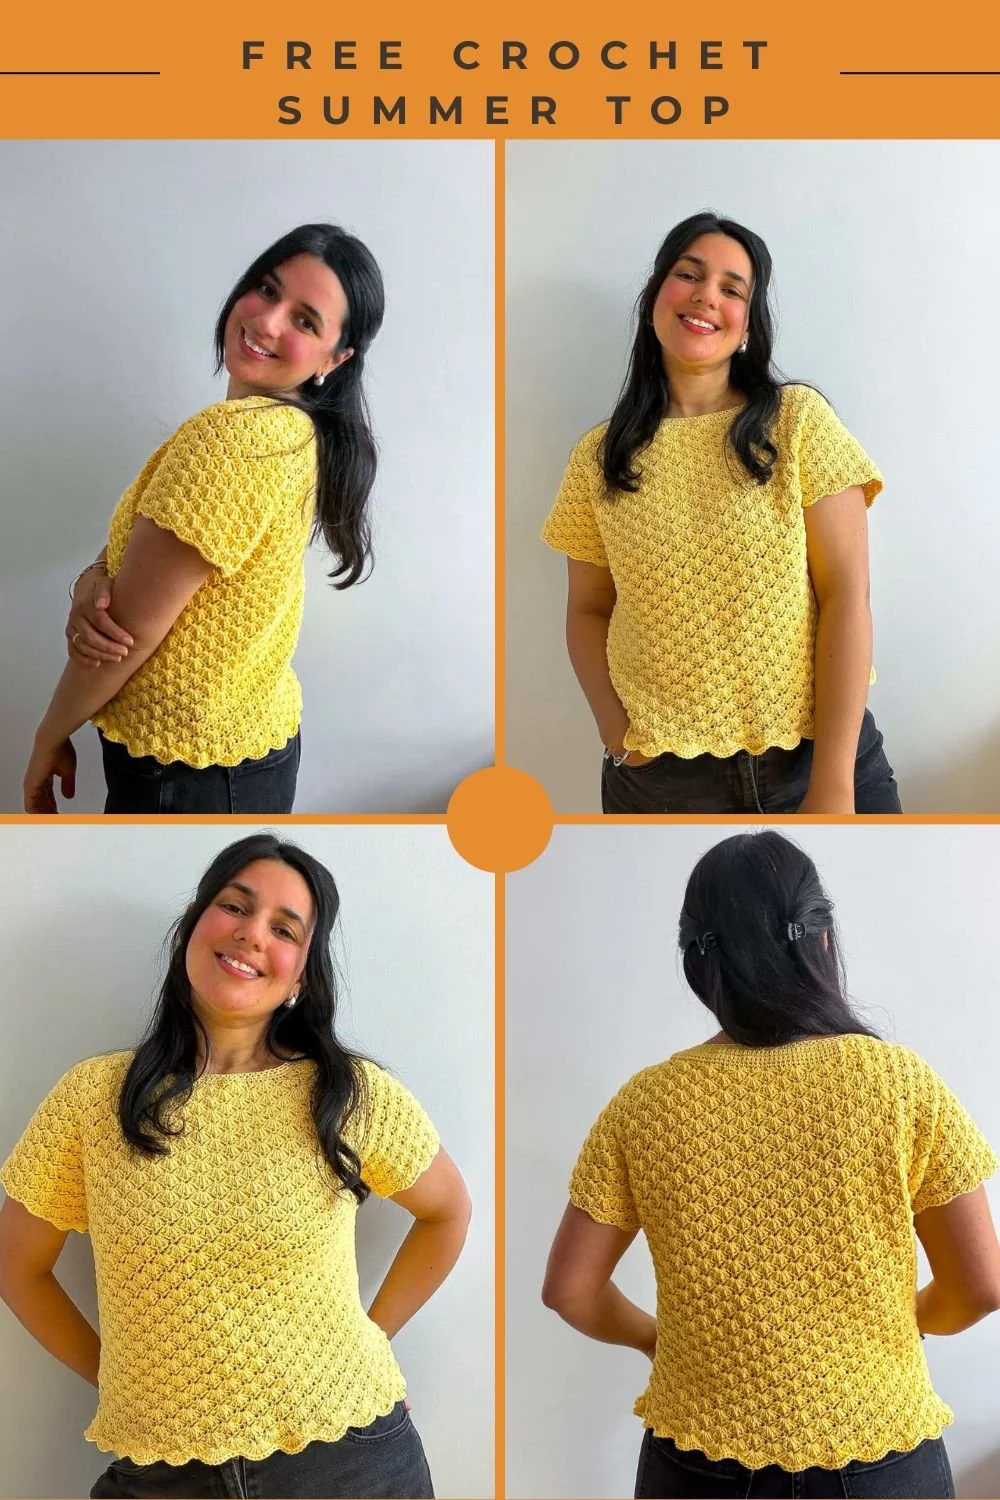
Step into summer with the Wildflower Summer Top, a lightweight crochet top inspired by warm days, soft colour, and the simple beauty of blooming flowers.
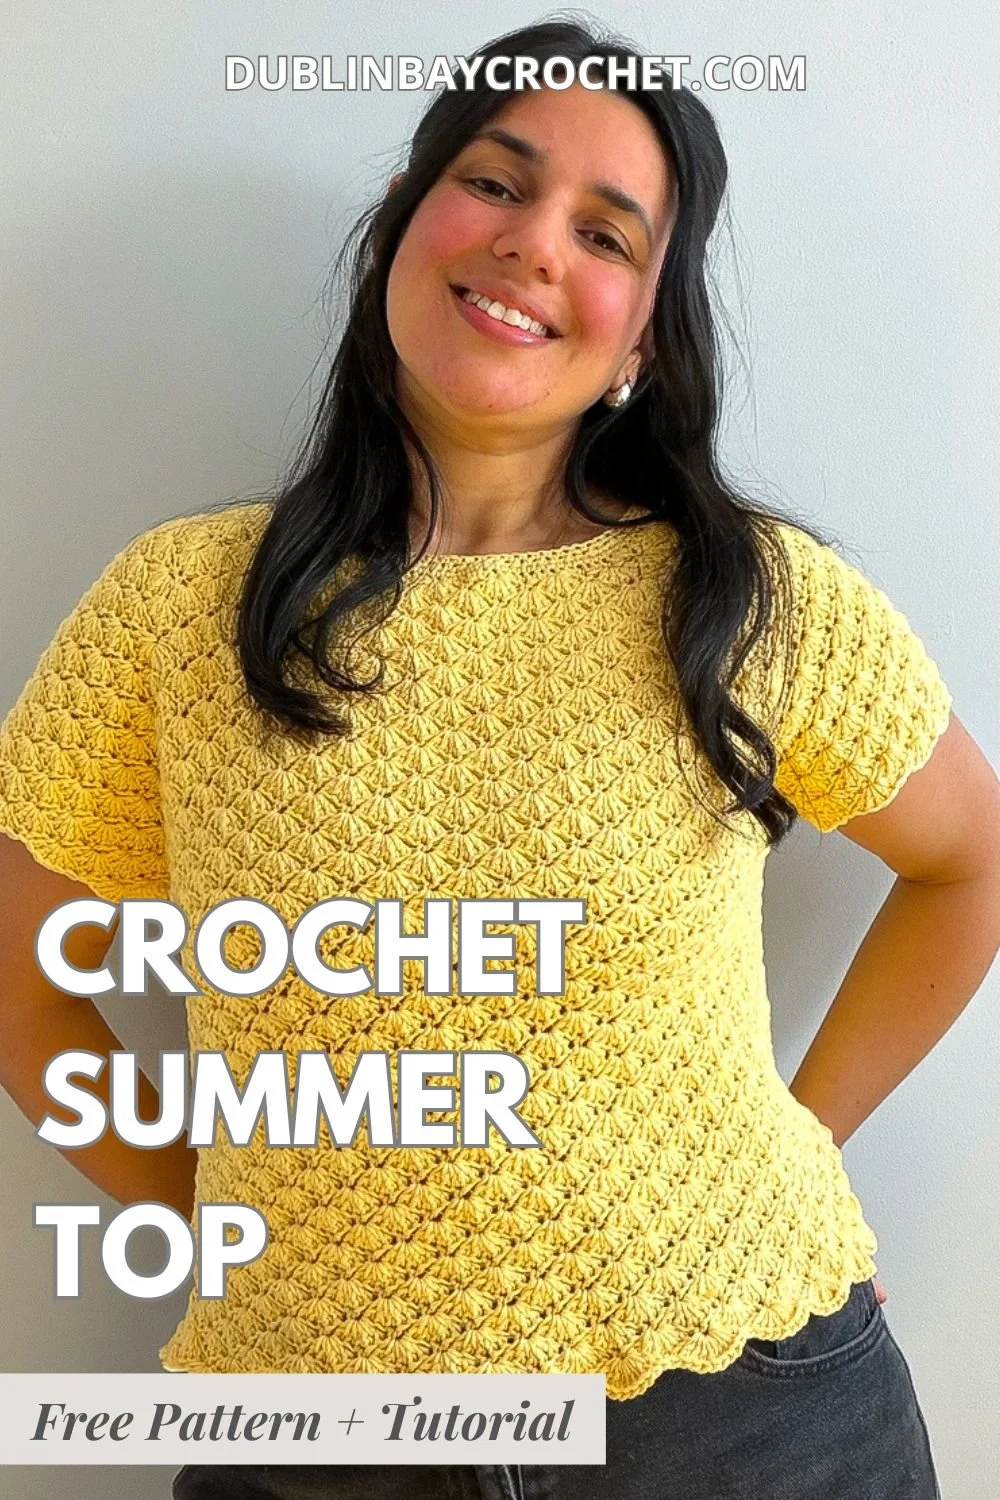
The Wildflower Summer Top is a feminine shell-stitch crochet top designed for warm-weather comfort and effortless styling. Featuring a breezy textured fabric, customisable length, and two neckline options, this pattern lets you choose between a clean, classic neckline or a delicate flower neckline.
When I started designing this top, I wanted to create something that felt feminine and pretty, but still wearable in everyday life. I love crochet garments that look beautiful in photos, but I always want them to be practical too — something you can actually style with jeans, shorts, linen trousers, or a skirt without feeling too dressed up. The Wildflower Summer Top has that soft handmade look, while still being simple enough to wear throughout the summer.
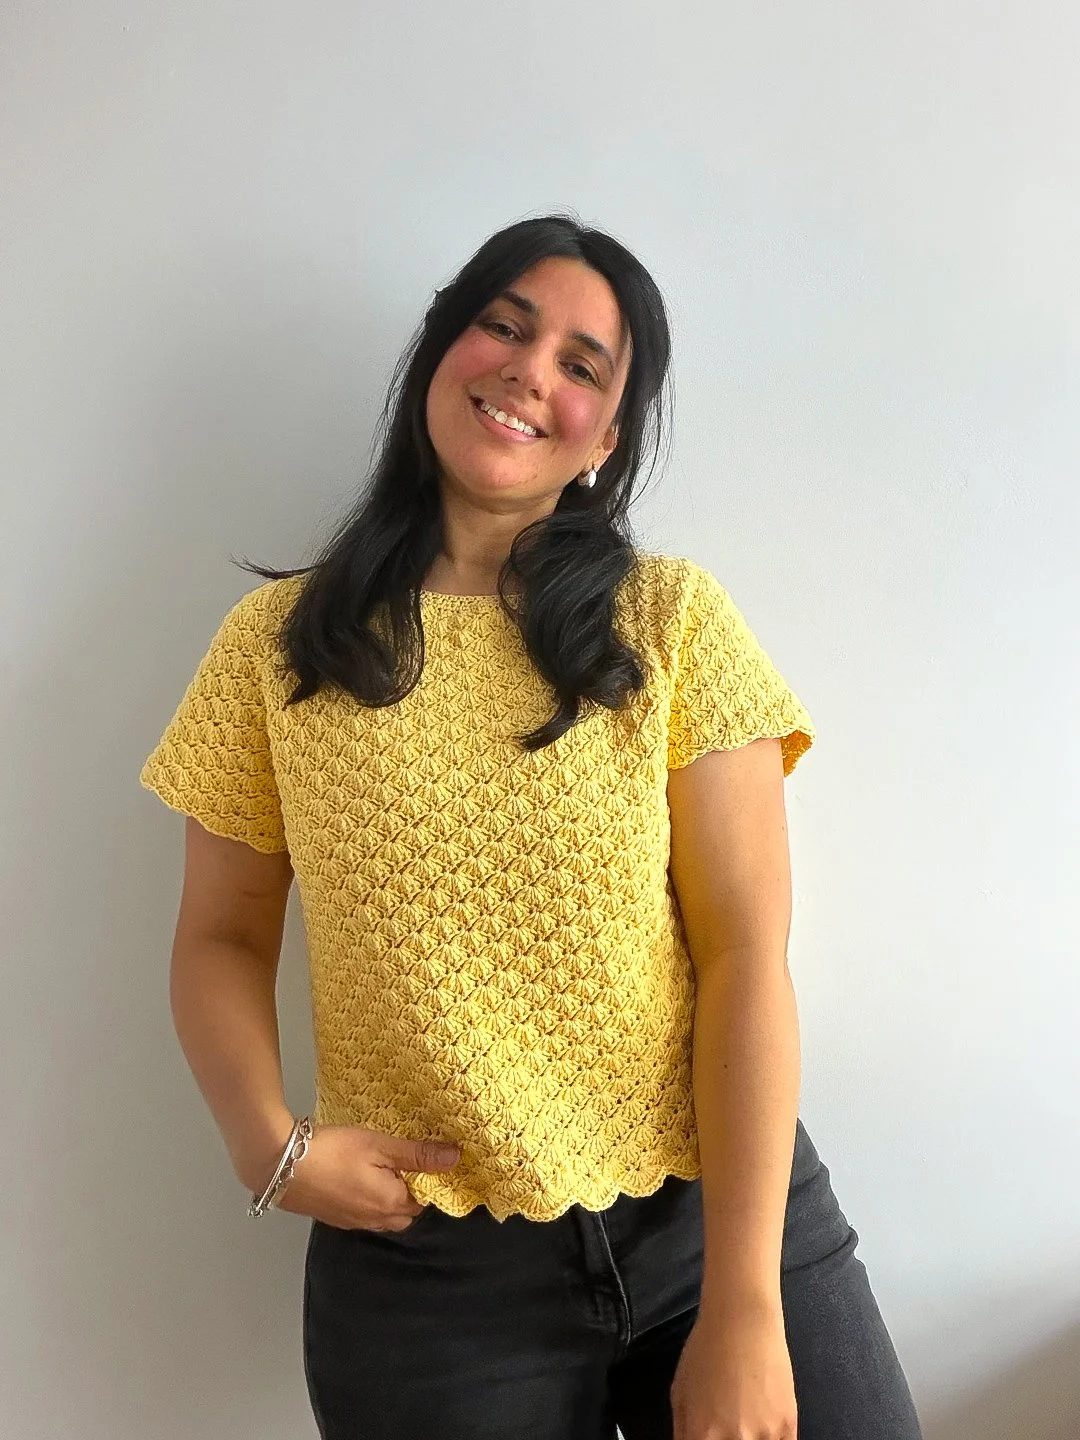
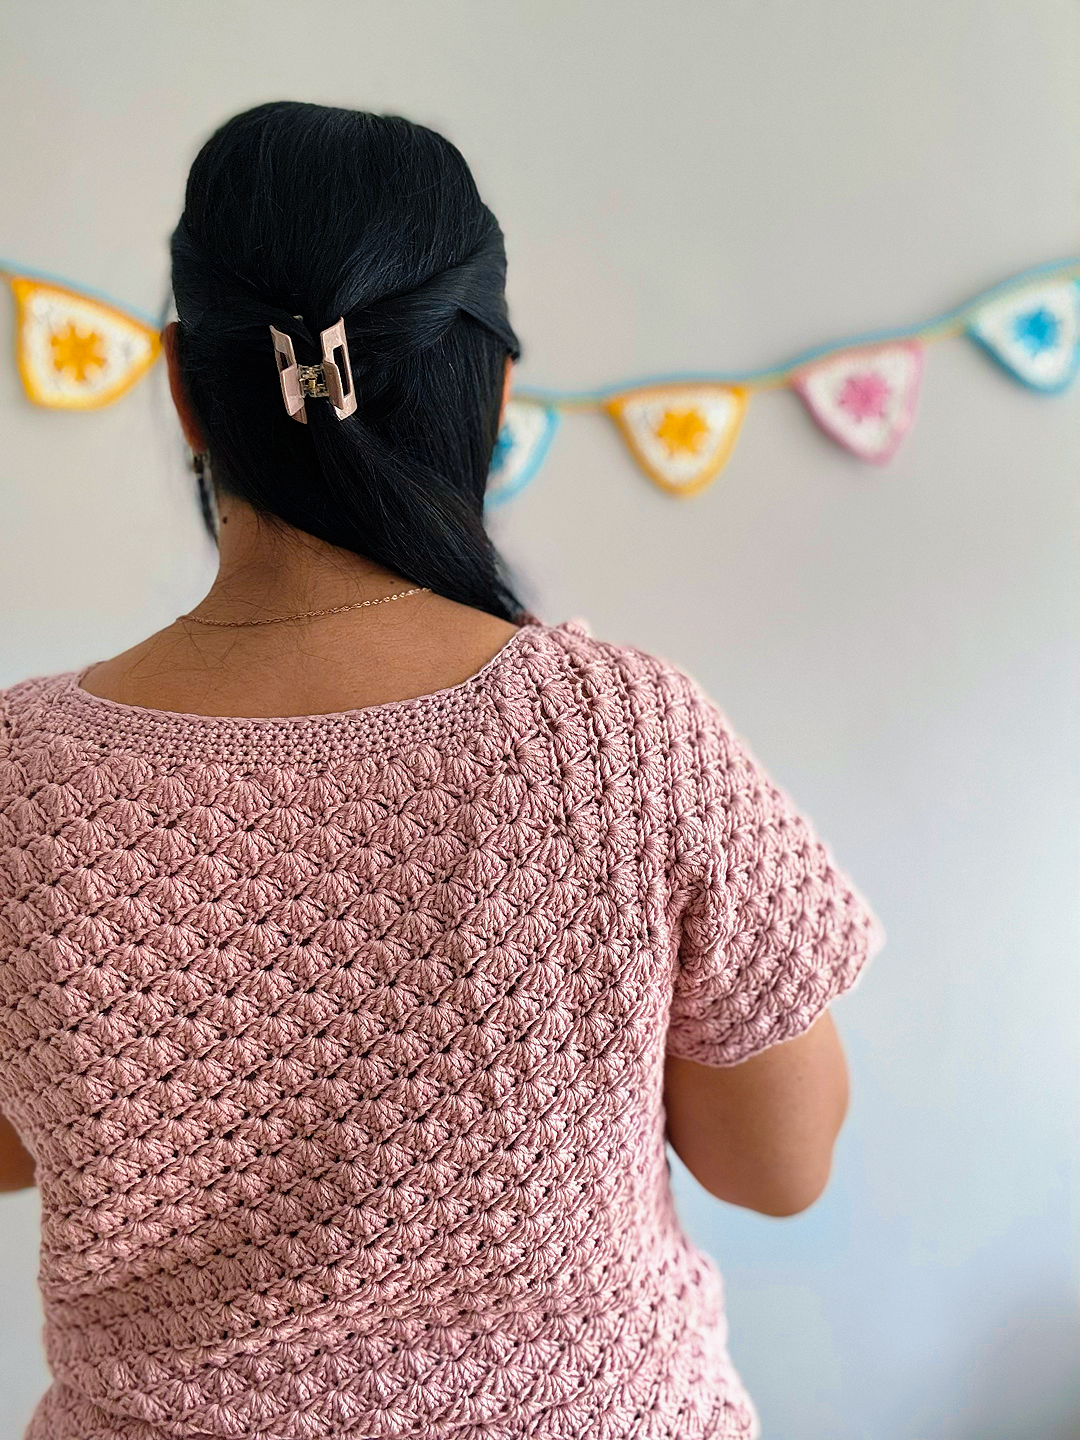
The main feature of this design is the beautiful shell stitch texture. It gives the top a lovely open fabric that feels light and summery, while still adding enough detail to make the finished piece feel special. Once you get into the rhythm of the stitch pattern, it becomes a really enjoyable project to work on, and the texture starts to build up beautifully as you crochet.
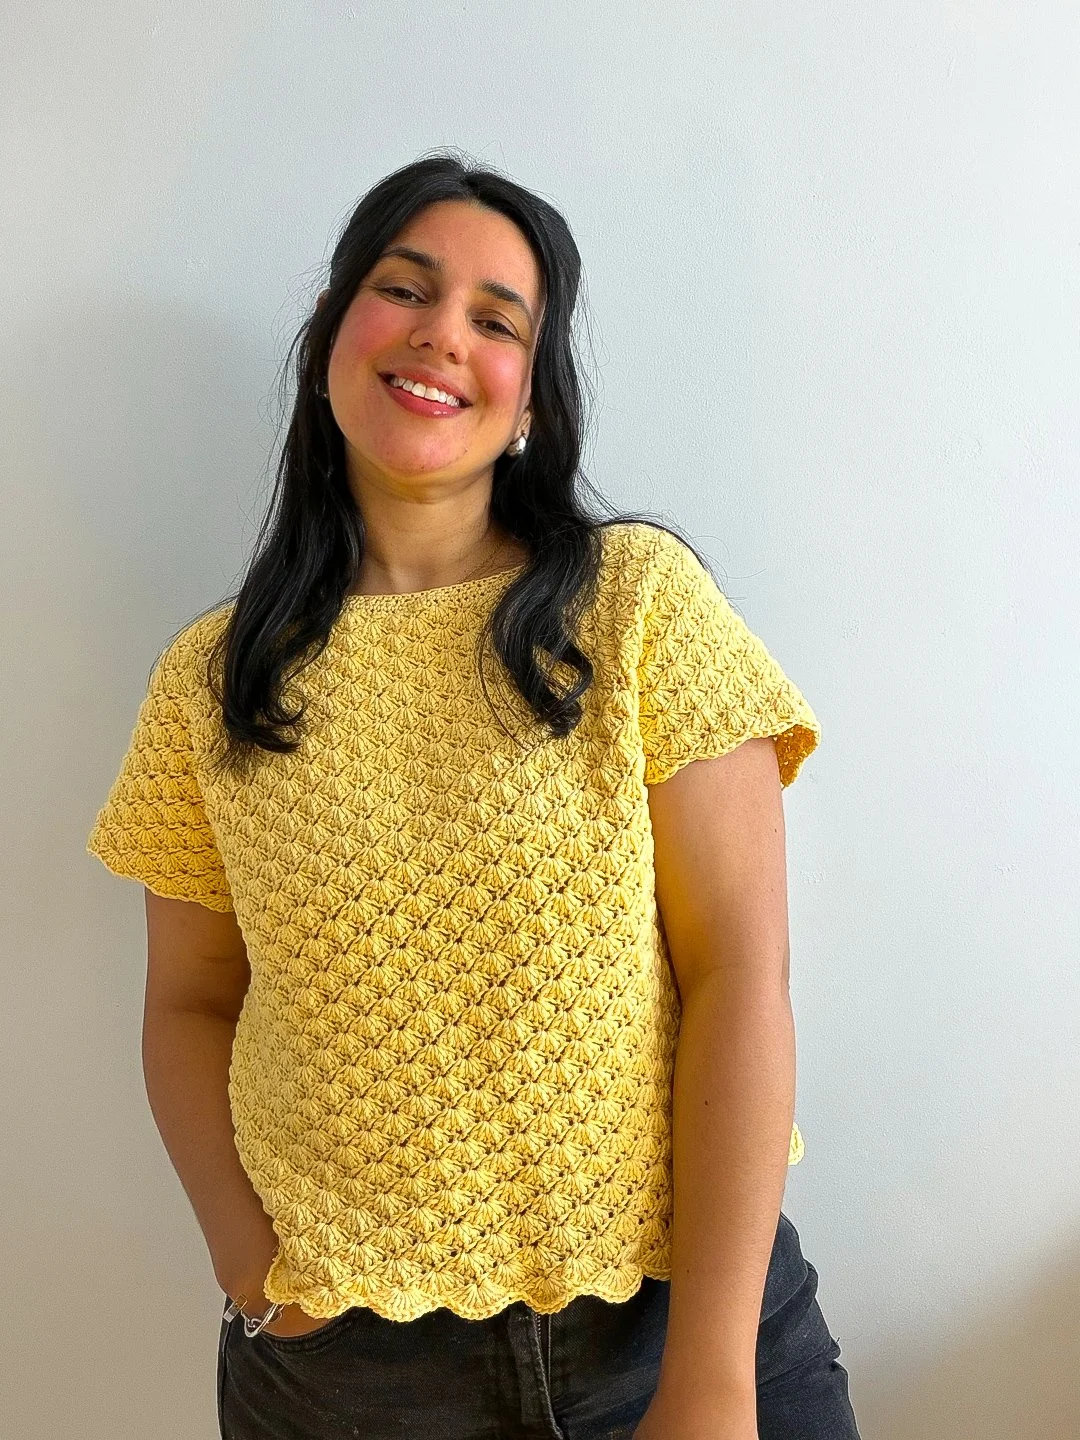
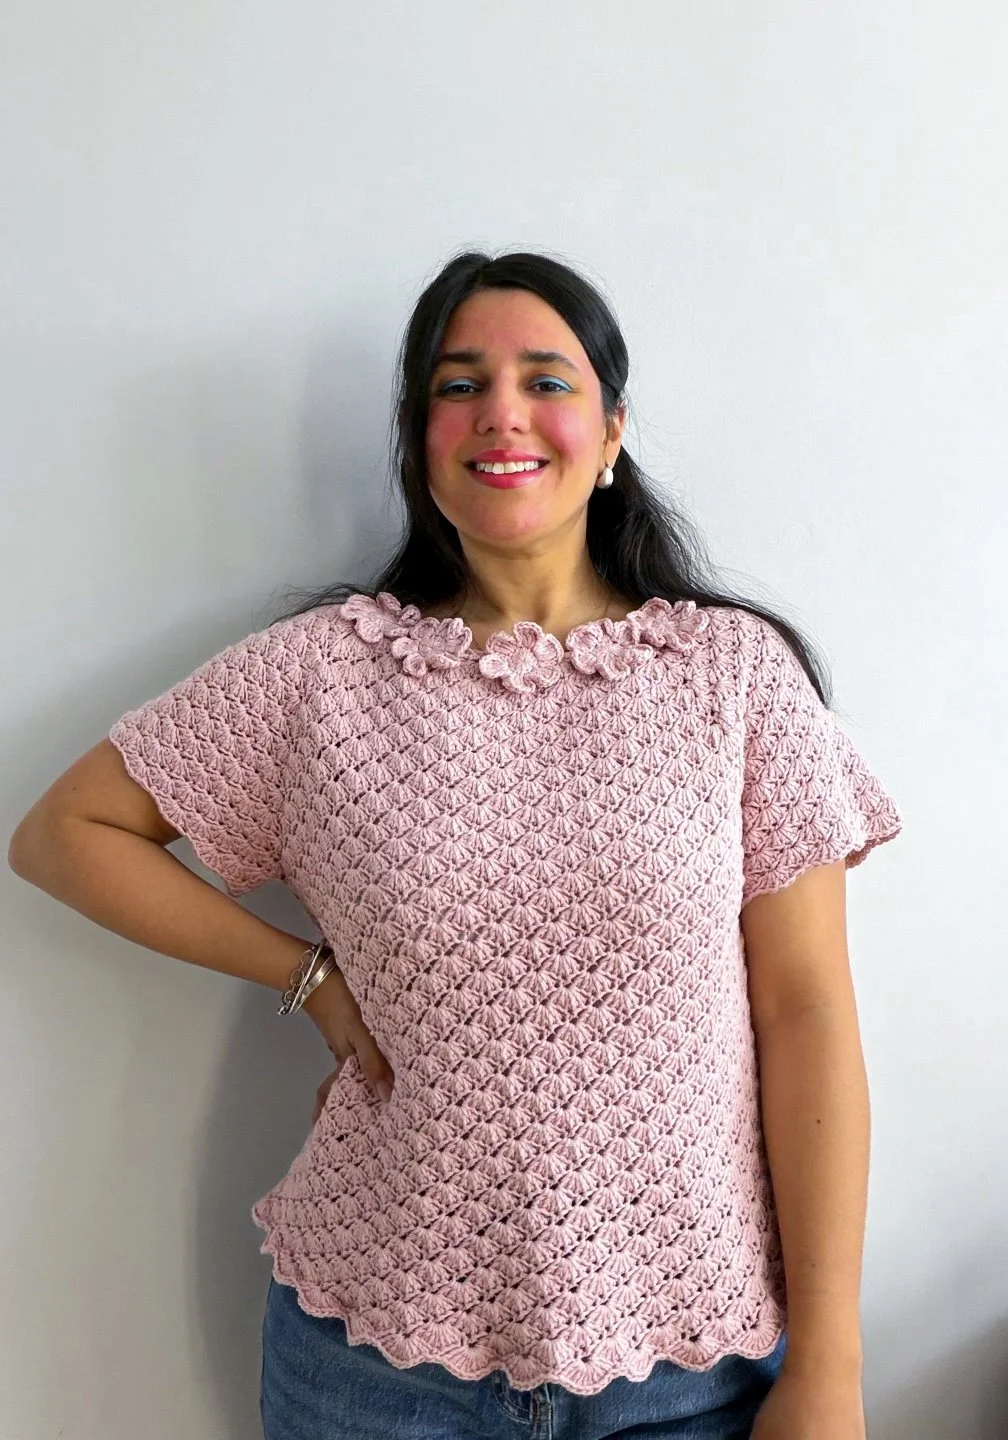
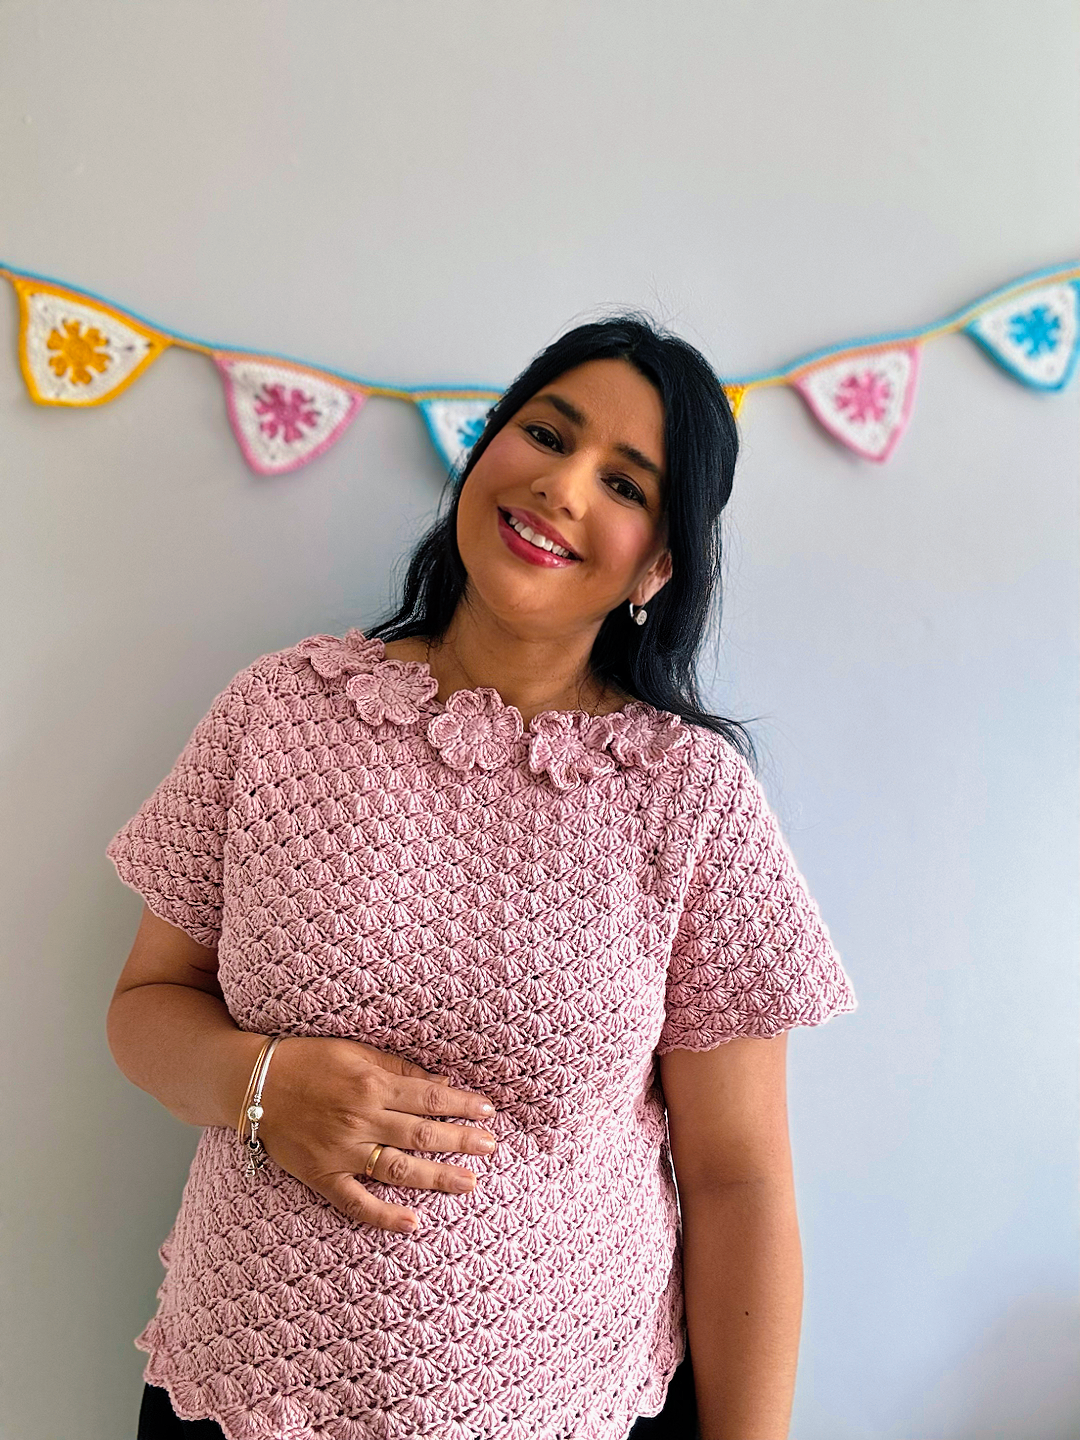
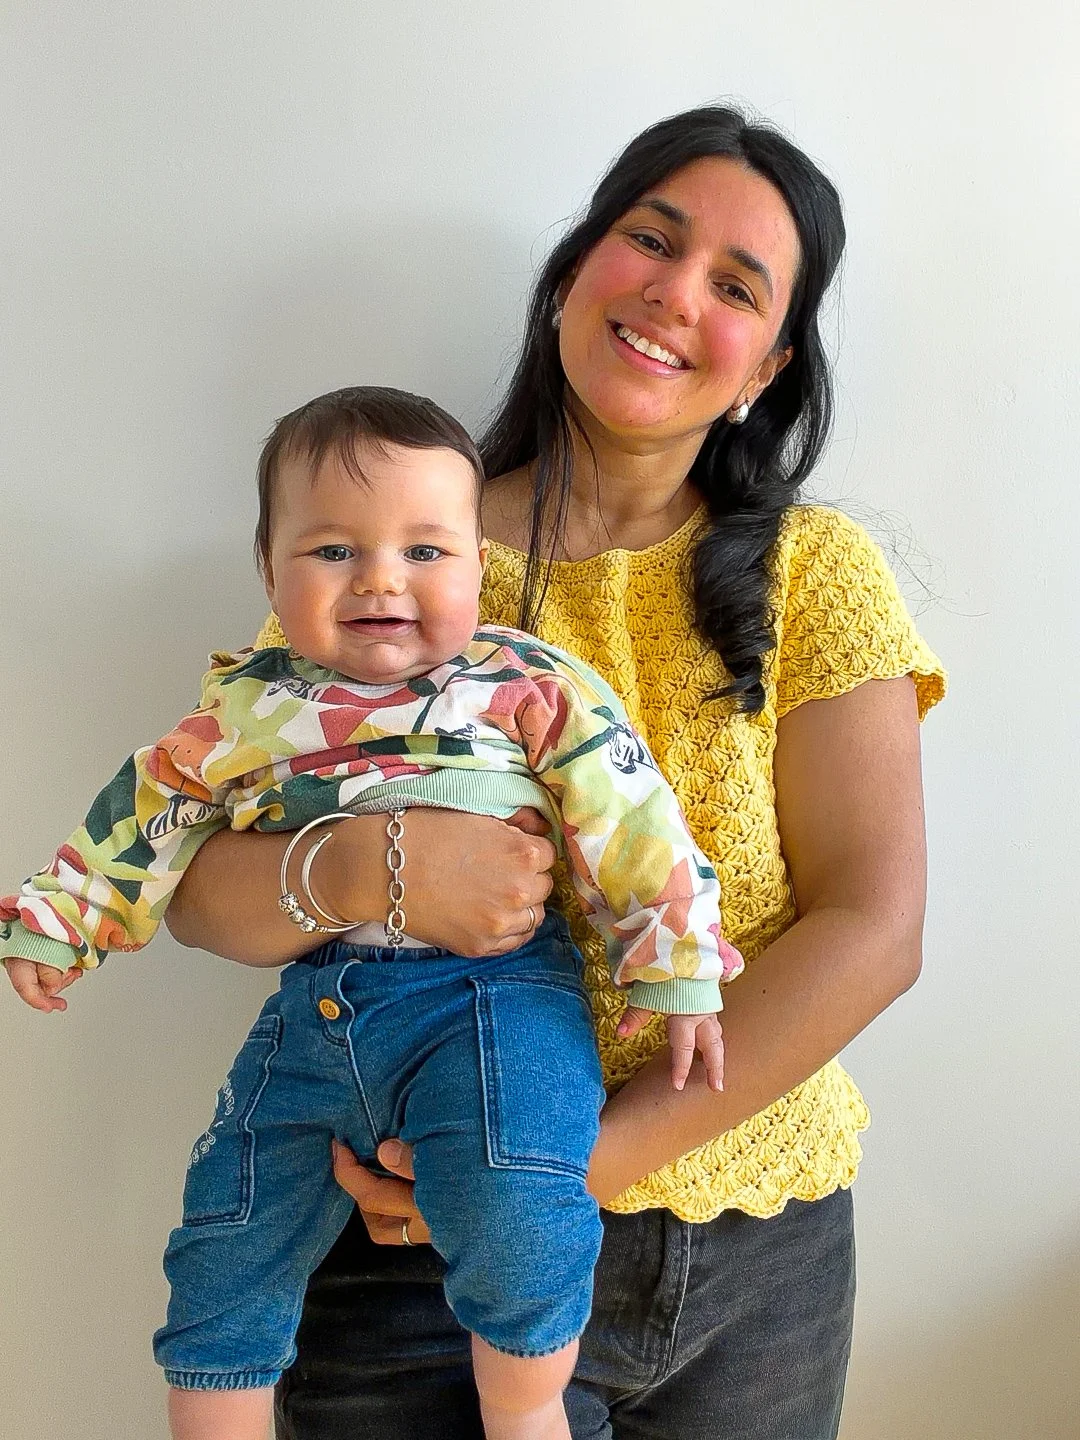
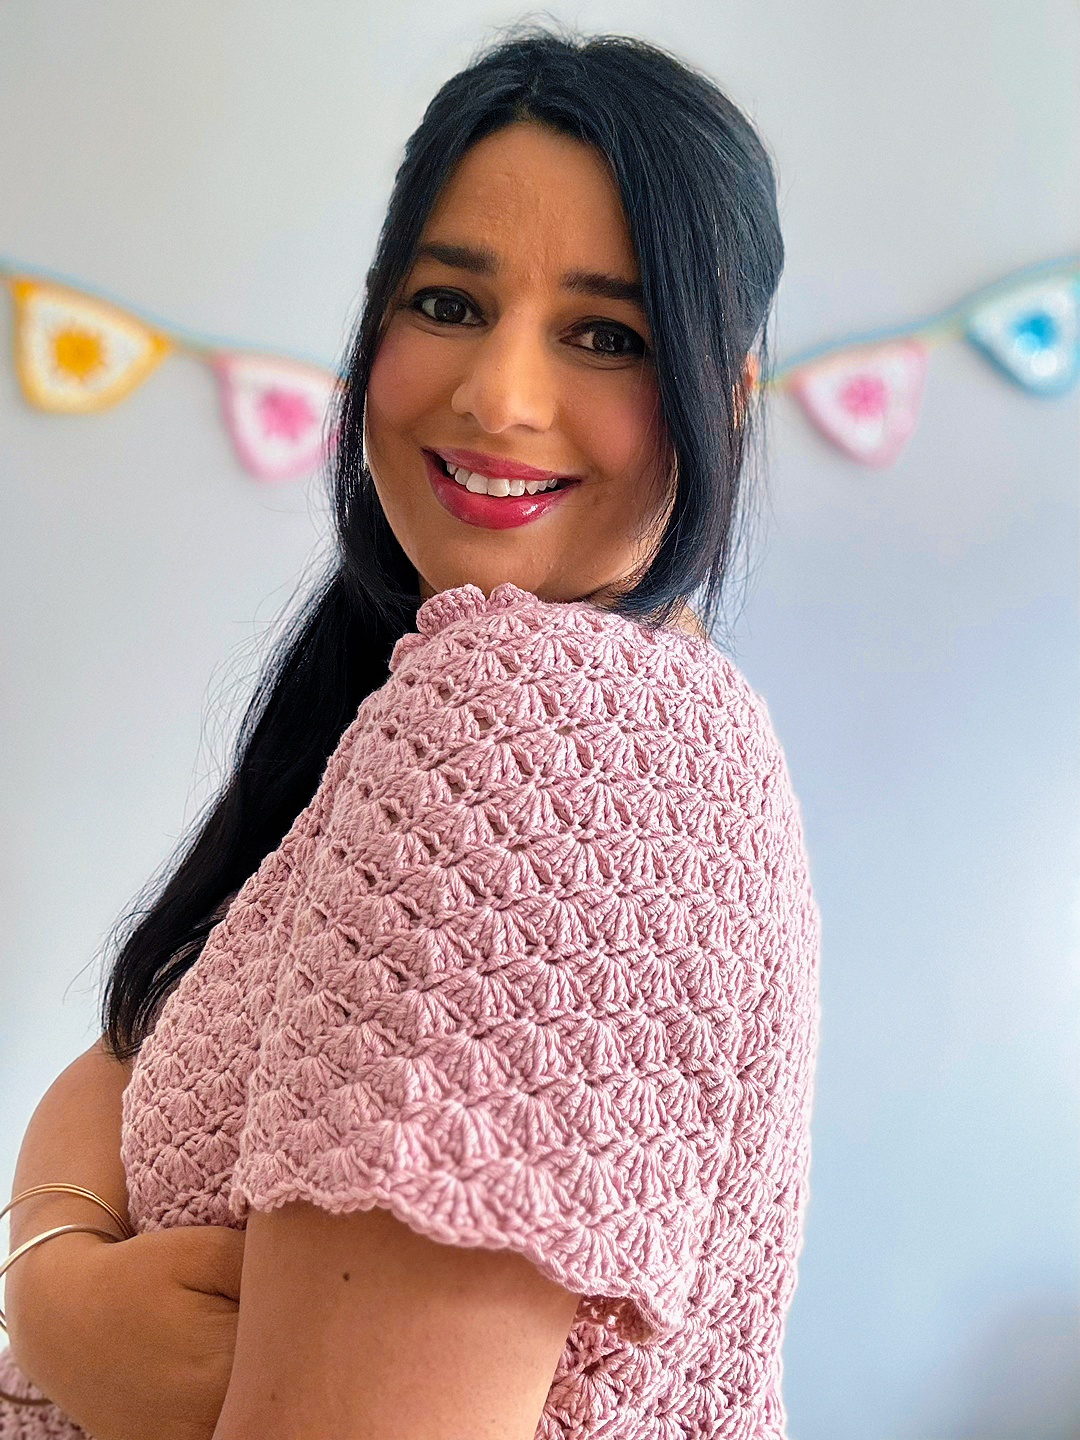
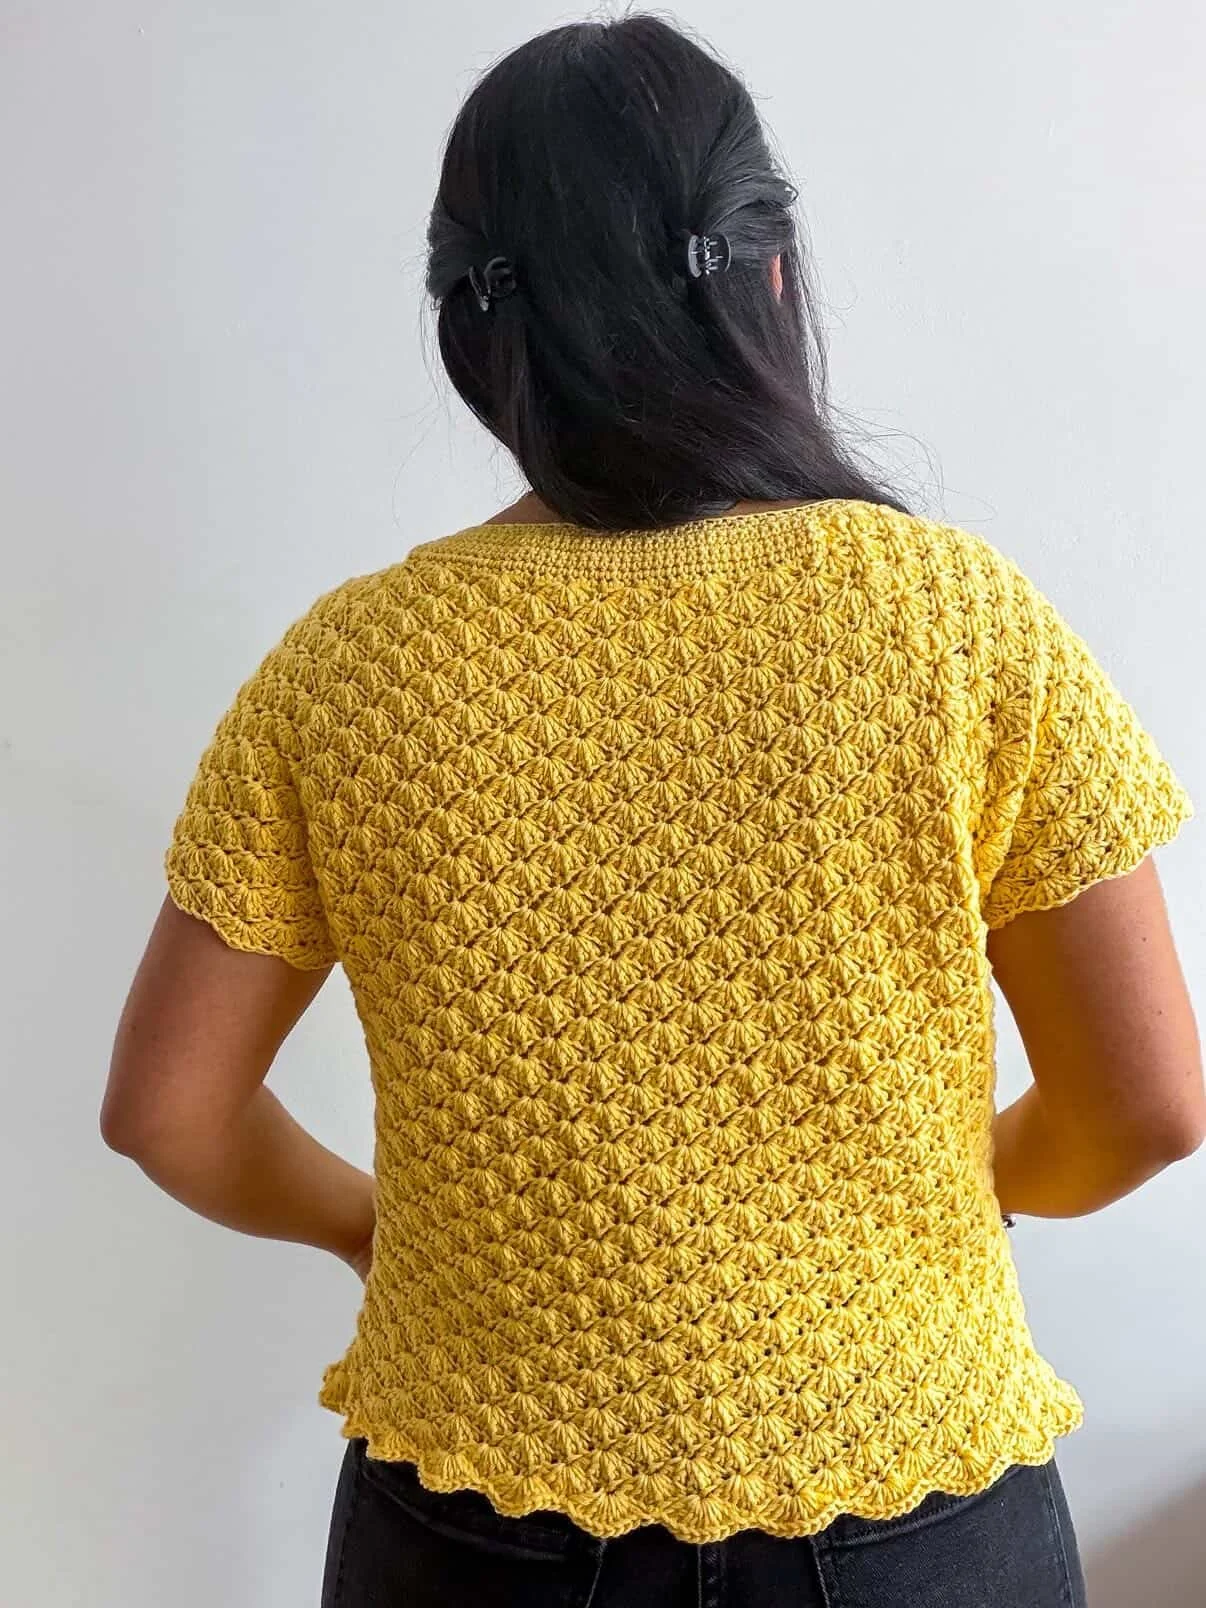
For my samples, I made two different versions of this top. The yellow version is made in size M and has a clean neckline without the flowers, which gives it a simple, classic summer look. The pink version has the crochet flowers added around the neckline for a softer, more decorative finish.
You may notice that the pink version has a slightly roomier fit. I actually made that sample when I was pregnant last year, so I adjusted the fit a little to make it more comfortable at the time. I love that it shows how easy this top is to adapt depending on the fit you want. You can make it more fitted, slightly oversized, cropped, or longer, depending on your own style and body shape.
For this design, I used a lightweight summer yarn that gives the top a soft drape and keeps the fabric comfortable for warmer weather. The yarn works beautifully with the shell stitch, helping the texture stand out without making the top feel too heavy. It is exactly the kind of yarn I like for summer garments — light, breathable, and easy to wear.
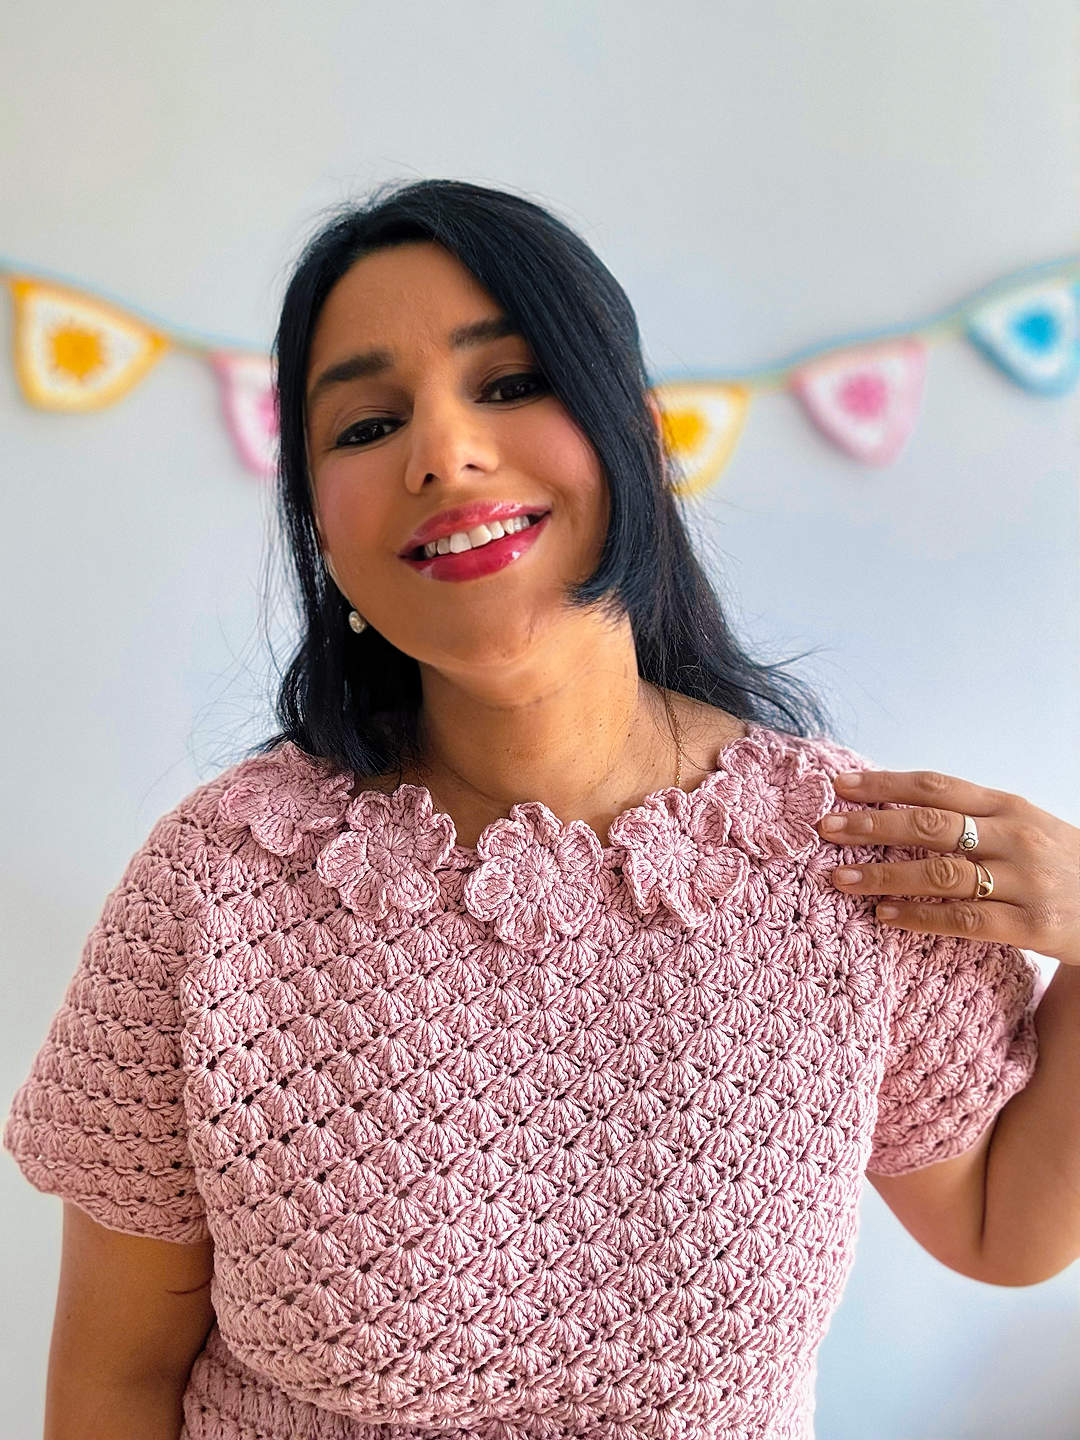
One of my favourite things about this pattern is that you can choose between two different neckline options. Keep it simple like the yellow version for a clean, minimal finish, or add the little crochet flowers like the pink version if you want something a little more playful and detailed. Both versions use the same base pattern, so you can decide at the end which look you prefer.
How about sizing?
The pattern includes a range of sizes (from XS to XXL) and since it’s worked top-down in one piece, you’ll be able to tailor it perfectly to your body—no guesswork, no surprises. Just try it on occasionally, and you’ll get a custom fit with no extra effort.
The length is also easy to customise. You can make your Wildflower Summer Top cropped to wear with high-waisted jeans or shorts, or add extra rows for a more classic fit. This makes it a lovely summer crochet project that you can adapt to your own wardrobe.
This free crochet pattern is perfect if you are looking for a summer top that feels light, pretty, and fun to make. It has texture, optional flower details, and a relaxed shape that is easy to style for warm weather.
Keep reading for the free Wildflower Summer Top crochet pattern and make your own version with or without the flower neckline detail.
Upgrade to the Printable PDF
If you prefer crocheting from a beautifully formatted, ad-free version, you can purchase the printable Wildflower Summer Top PDF. The paid pattern includes everything in one easy-to-follow file, with space to mark your own size, detailed schematics, a full measurement table, and a helpful row-by-row stitch count table so you can easily keep track as you work through the pattern.
It’s a lovely option if you want to print the pattern, highlight your size, make notes as you go, and crochet without scrolling through the blog post.Upgrade to the Printable PDF
If you prefer crocheting from a beautifully formatted, ad-free version, you can purchase the printable Wildflower Summer Top PDF. The paid pattern includes everything in one easy-to-follow file, with space to mark your own size, detailed schematics, a full measurement table, and a helpful row-by-row stitch count table so you can easily keep track as you work through the pattern.
It’s a lovely option if you want to print the pattern, highlight your size, make notes as you go, and crochet without scrolling through the blog post.
If you’re a visual learner, I’ve included a step-by-step video tutorial to go along with this pattern. The video will guide you through the Wildflower Summer Top so you can follow the stitch pattern, construction, and finishing details with more confidence.
Watch the tutorial below and crochet along with me.
Permissions + Copyright:
Please do not publish or share this pattern as your own. You may make items to sell with this pattern. In exchange, please link back this post. Do NOT use our photos as your own sales photos.
Materials
You will need:
Any DK weight yarn (I used Hobbii Acacia; DK; 250 m per 100gr ball; 51% acrylic, 49% cotton)
*Daffodil (15)- color A- 3 (3, 4, 5, 6, 7) balls for 1st sample.
*Powder Rose (19) color A- 3 (3, 4, 5, 6, 7) balls for 2nd sample.
5mm crochet hook or size needed to obtain tension
4 mm crochet hook for neckline
Notions: Tapestry needle
Scissors
Measuring tape
Skill Level:
Intermediate. If you never crocheted a garment before you can follow the video tutorial on my Youtube channel where I explain STEP- BY- STEP how to crochet this top.
TENSION:
3 SHELLS x 10 Rows = 10 x 10 cm/ 4 x4 inches
There are 17 sts included in 10 cm: 1 sc, 1 SHELL (5 dc), 1 sc, 1 SHELL, 1 sc and only 4 dc of the next SHELL= 17 sts.
Abbreviations (US terms)
Ch- Chain
Ch-sp- Chain space
St/s- Stitch/es
Beg- Beginning
Rnd- Round
RS- Right side (of work)
WS- Wrong side (of work)
Inc- Increase
Sl st- Slip stitch
Sc- Single crochet
Dc- Double crochet
Special Stitch
SHELL: 5 dc in designated stitch.

STITCH PATTERN
Before you start working on your top, please take the time to crochet a sample using the stitch pattern below. After you finish, measure your sample and make sure it matches my tension. It is very important you do not skip this step as you will have time to familiarize with the stitch pattern and you can make sure your top will have the same measurements given for each size. The stitch used throughout the pattern is the SHELL STITCH.
FOR SWATCH, chain 55
SET UP ROW: 1 sc in 2nd ch from hook, 1 sc in each ch available, join with sl st to 1st sc from row to start working in the round. 54 sc in total.
Rnd 1: 1 sc in 1st sc, miss 2 sc, SHELL in next sc, miss 2 sc, 1 sc in next sc, miss 2 sc, rep from across, join with sl st to 1st sc of rnd. 9 SHELLS in total.
Rnd 2: 3 ch, 4 dc in same st, miss 2 dc, 1 sc in next dc, miss 2 dc, [SHELL in next sc, miss 2 dc, 1 sc in next dc, miss 2 dc] repeat until the end of the rnd, join with sl st to 3rd ch from initial 3 ch. 9 SHELLS in total.
Rnd 3: Move with sl st to 3rd dc from next SHELL, 1 ch, 1 sc in same st, miss 2 sc, SHELL in next sc, miss 2 sc, rep from until the end of the rnd, join with sl st to 1st sc from rnd.
Rnd 4: Rep rnd 2.
Rnd 5: Rep rnd 3.
Rep rnds 3 and 4 a further 5 times.

SIZES AND MEASUREMENTS
This Top is written in 6 different sizes as follow: XS (S, M, L, XL, XXL). Make sure to follow the number for your size only. It is recommended that you go through the pattern and highlight numbers pertaining to your size before beginning.
Finished Bust: (A)
77.5 (92, 99, 113, 120, 134) cm
Top is designed to be worn with approximate 2 to 5.5 cm of positive ease. Actual body measurements are based on the Craft Yarn Council.
XS (76 cm); S (86 cm); M (97 cm); L (107 cm); XL (117 cm); XXL (127 cm)
For size reference, model has 92 cm bust and is wearing a size M.
Notes on Pattern
Construction
This design features raglan shaping, worked seamlessly from the top down. After completing the increases, the yoke is folded and separated to create space for the body and the sleeves.
The yoke is worked in the round, without turning at the end of the rounds. The increases are worked over 3 rounds and you will have 4 extra SHELLS every 3 rounds.
Adjustments
The length of the top is completely customizable, just add or subtract rows to the body to make it longer or shorter.
Start Here
Yoke
Using 5 mm hook and colour A, ch 121 (121, 133, 145, 145, 157).
Set up row: 1 sc in 2nd ch from hook, 1 sc in each ch available. 120 (120, 132, 144, 144, 156) sc in total. Join with sl st to work in the round, being careful not to twist. This method will leave a little open to the neck. You can sew it now or at the end of your work.
Rnd 1: 1 ch (does not count as a st here and throughout), 1 sc in 1st sc, miss 2 sc, SHELL in next sc, miss 2 sc, 1 sc in next sc, miss 2 ch, rep from across, join with sl st to 1st sc of rnd. 20 (20, 22, 24, 24, 26) SHELLS in total.
Rnd 2: Move with sl st to 3rd dc from next SHELL, 1 ch, (1 sc, 1 ch, 1 sc) in same dc -INC made- miss 2 dc, SHELL in next sc, [miss 2 dc, 1 sc in next dc, miss 2 dc, SHELL in next sc] 5 (5, 6, 7, 7, 8) times in total - this is the FRONT PANEL, miss 2 dc, (1 sc, 1 ch, 1 sc) in next dc -INC made, miss 2 dc, SHELL in next sc, [miss 2 dc, 1 sc in next dc, miss 2 dc, SHELL in next sc] 3 times in total, miss 2 dc, (1 sc, 1 ch, 1 sc) in next dc, rep from to , join with sl st to 1st sc from rnd. 6 (6, 7, 8, 8, 9) shells for FRONT and BACK panel, 4 Shells for each sleeve = 20 (20, 22, 24, 24, 26) SHELLS in total and 4 corner spaces (1 sc, 1 ch, 1 sc).
Rnd 3: 3 ch (counts as 1st dc), 4 dc in same st, 1 sc in next 1ch-sp, SHELL in next sc, miss 2 dc, 1 sc in next dc, [miss 2 dc, SHELL in next sc, miss 2 dc, 1 sc in next dc] rep the steps between [...] until you reach next sc from corner space,* miss 2 dc, SHELL in sc from corner space, 1 sc in 1ch-sp, SHELL in next sc from corner space* rep from to 3 more times, finishing last rep at **, join with sl st to 3rd ch from initial 3 ch. 7 (7, 8, 9, 9, 10) Shells for FRONT and BACK, 5 Shells for each sleeve = 24 (24, 26, 28, 28, 30) SHELLS in total.
Rnd 4: Move with sl st to 3rd dc from SHELL, 1 ch, 1 sc in same st, miss 2 dc, SHELL in next sc, miss 2 dc, 1 sc in next dc, miss 2 dc, SHELL in next sc, rep from across, placing a stitch marker on 3rd dc from each SHELL in each corner space, miss 2 dc, join with sl st to 1st sc from rnd. 24 (24, 26, 28, 28, 30) SHELLS in total.
Size XS only
Rnd 5: 3 ch (counts as 1st dc), 4 dc in same st, miss 2 dc, 1 sc in next dc, miss 2 dc, SHELL in next sc, miss 2 dc, 1 sc in next dc, rep from across, miss 2 dc, join with sl st to 3rd ch from initial 3 ch. 24 SHELLS in total.
Rnd 6: Move with sl st to 3rd dc from SHELL, 1 ch, 1 sc in same st, miss 2 dc, SHELL in next sc, miss 2 dc, 1 sc in next dc, miss 2 dc, SHELL in next sc, rep from across, placing a stitch marker on 3rd dc from each SHELL in each corner space, miss 2 dc, join with sl st to 1st sc from rnd. 24 SHELLS in total.
All sizes
Rnd 7 (5, 5, 5, 5, 5): Move with sl st to 3rd dc from SHELL (this is the st where the st marker is placed), 1 ch, (1 sc, 1 ch, 1 sc) in marked dc -INC made, miss 2 dc, SHELL in next sc, [miss 2 dc, 1 sc in next dc, miss 2 dc, SHELL in next sc] rep the steps between [...] until next marked dc, miss 2 dc, rep from to three more times, join with sl st to 1st sc from rnd. 7 (7, 8, 9, 9, 10) shells for FRONT and BACK panel, 5 Shells for each sleeve = 24 (24, 26, 28, 28, 30) SHELLS in total and 4 corner spaces (1 sc, 1 ch, 1 sc).
Rnd 8 (6, 6, 6, 6, 6): Rep rnd 3. 8 (8, 9, 10, 10, 11) Shells for FRONT AND BACK, 6 Shells for each sleeve = 28 (28, 30, 32, 32, 34) SHELLS in total.
Rnd 9 (7, 7, 7, 7, 7): Rep rnd 4. 28 (28, 30, 32, 32, 34) SHELLS in total.
Sizes (XL) and XXL only
Rnd 8: Move with sl st to 3rd dc from SHELL, 1 ch, 1 sc in same st, miss 2 dc, SHELL in next sc, miss 2 dc, 1 sc in next dc, miss 2 dc, SHELL in next sc, rep from across, placing a stitch marker in each corner, miss 2 dc, join with sl st to 1st sc from rnd. (32) 34 SHELLS in total.
Rnd 9: 3 ch (counts as 1st dc), 4 dc in same st, miss 2 dc, (1 sc, 1 ch, 1 sc) in next dc -INC made, miss 2 dc, SHELL in next sc, [miss 2 dc, 1 sc in next dc, miss 2 dc, SHELL in next sc] rep the steps between [...] (8) 9 times in total, miss 2 dc, (1 sc, 1 ch, 1 sc) in next dc- INC made, miss 2 dc, SHELL in next sc, miss 2 dc, (1 sc, 1 ch, 1 sc) in next dc- INC made, miss 2 dc, SHELL in next st, [miss 2 dc, 1 sc in next dc, miss 2 dc, SHELL in next sc] rep the steps between [...] 4 times in total, miss 2 dc, (1 sc, 1 ch, 1 sc) in next dc- INC made, miss 2 dc, SHELL in next sc, miss 2 dc, (1 sc, 1 ch, 1 sc) in next dc -INC made, rep from to , join with sl st to 3rd ch from initial 3 ch. (10) 11 Shells for FRONT and BACK, 6 Shells for each sleeve = (32) 34 SHELLS in total and 8 increase spaces.
Sizes (XL) and XXL only continued
Rnd 10: Move with sl st to 3rd dc from SHELL, 1 ch, 1 sc in same st, miss 2 dc, SHELL in next sc, 1 sc in next 1ch-sp, SHELL in next sc, [miss 2 dc, 1 sc in next dc, miss 2 dc, SHELL in next sc] rep the steps between [...] until you reach next 1 ch-sp, 1 sc in 1ch-sp, SHELL in next sc, miss 2 dc*, 1 sc in next dc, miss 2 dc*, rep from to three more times, finishing last repeat at **, join with sl st to 1st sc from rnd. (12) 13 Shells for FRONT and BACK, 8 Shells for each sleeve = (40) 42 SHELLS in total.
Rnd 11: 3 ch (counts as 1st dc), 4 dc in same st, miss 2 dc, 1 sc in next st, miss 2 dc, SHELL in next sc, miss 2 dc, 1 sc in next dc, rep from across, placing a stitch marker on 3rd dc from each SHELL in each corner space, join with sl st to 3rd ch from initial 3 ch. (40) 42 SHELLS in total.
All Sizes
Rnd 10 (8, 8, 8, 12, 12): Rep rnd 7 (5, 5, 5, 5, 5). 8 (8, 9, 10, 12, 13) Shells for FRONT AND BACK, 6 (6, 6, 6, 8, 8) Shells for each sleeve = 28 (28, 30, 32, 40, 42) SHELLS in total and 4 corner spaces (1 sc, 1 ch, 1 sc).
Rnd 11 (9, 9, 9, 13, 13): Rep rnd 3. 9 (9, 10, 11, 13, 14) Shells for FRONT AND BACK, 7 (7, 7, 7, 9, 9) Shells for each sleeve = 32 (32, 34, 36, 44, 46) SHELLS in total.
Rnd 12 (10, 10, 10, 14, 14): Rep rnd 4.32 (32, 34, 36, 44, 46) SHELLS in total.
Size XS only
Rnd 13: Rep rnd 5. 32 SHELLS in total.
Rnd 14: Rep rnd 6. 32 SHELLS in total.
All sizes
Rnd 15 (11, 11, 11, 15, 15): Rep rnd 7 (5, 5, 5, 5, 5). 9 (9, 10, 11, 13, 14) Shells for FRONT AND BACK, 7 (7, 7, 7, 9, 9) Shells for each sleeve = 32 (32, 34, 36, 44, 46) SHELLS in total and 4 corner spaces (1 sc, 1 ch, 1 sc).
Rnd 16 (12, 12, 12, 16, 16): Rep rnd 3. 10 (10, 11, 12, 14, 15) Shells for FRONT AND BACK, 8 (8, 8, 8, 10, 10) Shells for each sleeve = 36 (36, 38, 40, 48, 50) SHELLS in total.
Rnd 17 (13, 13, 13, 17, 17): Rep rnd 4. 36 (36, 38, 40, 48, 50) SHELLS in total.
Size XXL only
Rnd 18: Rep rnd 8. 50 Shells in total.
Rnd 19: 3 ch (counts as 1st dc), 4 dc in same st, miss 2 dc, 1 ch, (1 sc, 1 ch, 1 sc) in next dc -INC made, miss 2 dc, SHELL in next sc, [miss 2 dc, 1 sc in next dc, miss 2 dc, SHELL in next sc] rep the steps between [...] 13 times in total, miss 2 dc, (1 sc, 1 ch, 1 sc) in next dc -INC made, miss 2 dc, SHELL in next sc, miss 2 dc, (1 sc, 1 ch, 1 sc) in next dc- INC made, miss 2 dc, SHELL in next st, [miss 2 dc, 1 sc in next dc, miss 2 dc, SHELL in next sc] rep the steps between [...] 8 times in total, miss 2 dc, (1 sc, 1 ch, 1 sc) in next dc -INC made, miss 2 dc, SHELL in next sc, miss 2 dc, (1 sc, 1 ch, 1 sc) in next dc- INC made, rep from to , join with sl st to 3rd ch from initial 3 ch. 15 Shells for FRONT and BACK, 10 Shells for each sleeve = 50 SHELLS in total and 8 increase spaces.
Rnd 20: Rep rnd 10. 17 Shells for FRONT and BACK, 12 Shells for each sleeve = 62 SHELLS in total.
Rnd 21: Rep rnd 11. 58 SHELLS in total.
All sizes
Rnd 18 (14, 14, 14, 18, 22): Rep rnd 7 (5, 5, 5, 5, 5). 10 (10, 11, 12, 14, 17) Shells for FRONT AND BACK, 8 (8, 8, 8, 10, 12) Shells for each sleeve = 36 (36, 38, 40, 48, 58) SHELLS in total and 4 corner spaces (1 sc, 1 ch, 1 sc).
Sizes S (M) L (XL) and XXL only
Rnd 15 (15) 15 (19) 23: Rep rnd 3. 11 (12) 13 (15) 18 Shells for FRONT AND BACK, 9 (9) 9 (11) 13 Shells for each sleeve = 40 (42) 44 (52) 62 SHELLS in total.
Sizes S (M) L and (XL) only
Rnd 16 (16) 16 (20): Rep rnd 4. 40 (42) 44 (52) SHELLS in total.
Size S only
Rnd 17: Move with sl st to 3rd dc from SHELL (this is the st where the st marker is placed), 1 ch, 1 sc in marked dc, miss 2 dc, SHELL in next sc, [miss 2 dc, 1 sc in next dc, miss 2 dc, SHELL in next sc] rep the steps between [...] until next marked dc, miss 2 dc, (1 sc, 1 ch, 1 sc) in marked dc -INC made-, miss 2 dc, SHELL in next sc, [miss 2 dc, 1 sc in next dc, miss 2 dc, SHELL in next sc] rep the steps between [...] until next marked dc, miss 2 dc, rep from to , join with sl st to 1st sc from rnd. 11 shells for FRONT and BACK panel, 9 Shells for each sleeve= 40 SHELLS in total and 2 corner spaces (1 sc, 1 ch, 1 sc).
Rnd 18: 3 ch (counts as 1st dc), 4 dc in same st, miss 2 dc, 1 sc in next dc, [miss 2 dc, SHELL in next sc, miss 2 dc, 1 sc in next dc] rep the steps between [...] until you reach next (1 sc, 1 ch, 1 sc) corner space, miss 2 dc, SHELL in sc from corner space, 1 sc in 1ch-sp, SHELL in next sc from corner space rep from to , miss 2 dc, 1 sc in next dc, [miss 2 dc, SHELL in next sc, miss 2 dc, 1 sc in next dc] rep the steps between [...] 3 times in total, join with sl st to 3rd ch from initial 3 ch. 12 Shells for FRONT and BACK, 9 Shells for each sleeve = 42 SHELLS in total.
Rnd 19: Rep rnd 4. 42 SHELLS in total.
Sizes (M) L and (XL) only
Rnd (17) 17 (21): Rep rnd 7 (5) 5 (5). 11 (12) 13 (15) Shells for FRONT AND BACK, 9 (9) 9 (11) Shells for each sleeve = 40 (42) 44 (52) SHELLS in total and 4 corner spaces (1 sc, 1 ch, 1 sc).
Rnd (18) 18 (22): Rep rnd 3. 12 (13) 14 (16) Shells for FRONT AND BACK, 10 (10) 10 (12) Shells for each sleeve = 44 (46) 48 (56) SHELLS in total.
Sizes (M) and L only
Rnd 19: Rep rnd 4. (46) (48) SHELLS in total.
Rnd 20: Repeat rnd 5. (13) 14 Shells for FRONT AND BACK, (10) 10 Shells for each sleeve = 46 (48) SHELLS in total and 4 corner spaces (1 sc, 1 ch, 1 sc).
Sizes L only
Rnd 21: Rep rnd 3. 15 Shells for FRONT AND BACK, 11 Shells for each sleeve = (52) SHELLS in total.
SLEEVE SEPARATION AND BODY:
Sizes XS and (M) only:
Rnd 19 (21): Move with sl st to 1ch-sp from corner space, 3 ch, 4 dc in same space, miss 1 sc and 2 dc, 1 sc in next dc, [miss 2 dc, SHELL in next sc, miss 2 dc, 1 sc in next dc] repeat the steps between [...] until you reach the next corner space, miss 2 dc and 1 sc, SHELL in 1ch-sp from corner space, 1 sc in sc from corner space, 3 ch, miss 8 (10) shells (these will create the 1st sleeve), 1 sc in 1ch-sp from corner, SHELL in sc from corner space, miss 2 dc, 1 sc in next dc, [miss 2 dc, SHELL in next sc, miss 2 dc, 1 sc in next dc] repeat the steps between [...] until you reach the next corner space, miss 2 dc and 1 sc, SHELL in 1ch-sp from corner space, 1 sc in 1ch-sp, 3 ch, miss next 8 (10) SHELLS (these will create the 2nd sleeve), sl st to 3rd ch from initial 3 ch. 22 (28) SHELLS in total (11 (14) SHELLS for FRONT and 11 (14) SHELLS for BACK).
Size S only:
Rnd 20: 3 ch, 4 dc in same space, miss 2 dc, 1 sc in next dc, [miss 2 dc, SHELL in next sc, miss 2 dc, 1 sc in next dc] repeat the steps between [...] 11 times total, miss 2 dc, SHELL in next sc, 3 ch, miss 9 shells (these will create the 1st sleeve), SHELL in next sc, miss 2 dc, 1 sc in next dc, [miss 2 dc, SHELL in next sc, miss 2 dc, 1 sc in next dc] repeat the steps between [...] 11 times total, miss 2 dc, SHELL in next sc, 3 ch, miss next 9 SHELLS (these will create the 2nd sleeve), sl st to 3rd ch from initial 3 ch. 26 SHELLS in total -13 SHELLS for FRONT and 13 SHELLS for BACK.
Sizes L (XL) and XXL only:
Rnd 22 (23) 24: Move with sl st to 1 sc after first SHELL (corner SC), 3 ch, 4 dc in same space, miss 2 dc, 1 sc in next dc, [miss 2 dc, SHELL in next sc, miss 2 dc, 1 sc in next dc] repeat the steps between [...] times 14 (15) 17 in total, miss 2 dc, SHELL in next sc (corner SC), 3 ch, miss 11 (12) 13 shells (these will create the 1st sleeve), SHELL in sc (corner SC), rep from to , miss next 11 (12) 13 SHELLS (these will create the 2nd sleeve), sl st to 3rd ch from initial 3 ch. 32 (34) 38 SHELLS in total (16 (17) 19 SHELLS for FRONT and 16 (17) 19 SHELLS for BACK).
BODY
In order to keep things clear, the rounds to make the body will start at number 1.
All sizes
Rnd 1: Move with sl st to 3rd dc from 1st SHELL, 1 ch, 1 sc in same st, miss 2 dc, SHELL in next sc, miss 2 dc, 1 sc in next dc, miss 2 dc, SHELL in next sc rep from until you reach the last SHELL before 3 ch you work for the underarm, miss 2 dc, 1 sc in next dc, (miss 2 dc, 1 (0, 1, 0, 0, 0) sc, 1 ch) SHELL in next ch, (miss 1ch, 1 (0, 1, 0, 0, 0) sc, 2 dc) 1 sc in next dc, miss 2 dc, SHELL in next sc, miss 2 dc, 1 sc in next dc until you reach 3 ch from underarm, (miss 2 dc, 1 sc, 1 ch) SHELL in next ch, miss 1 ch and 2 dc, join with sl st to 1st sc from rnd. 22 (26, 28, 32, 34, 38) SHELLS in total.
Rnd 2: 3 ch, 4 dc in same st, miss 2 dc, SHELL in next sc, miss 2 dc, 1 sc in next dc, miss 2 dc, SHELL in next sc, miss 2 dc, 1 sc in next dc* rep from to until the end of the round, miss 2 dc, join with sl st to 3rd ch from initial 3 ch.
Rnd 3: Move with sl st to 3rd dc from 1st SHELL, 1 ch, 1 sc in same st, miss 2 dc, SHELL in next sc, miss 2 dc, 1 sc in next dc, miss 2 dc, SHELL in next sc rep from until the end of the round, miss 2 dc, join with sl st to 3rd ch from intial 3 ch.
Rnds 4- 23: Repeat rnds 2 and 3 10 times.
Work extra rounds if you want your top to be longer.
The following two rounds are optional if you'd like to add a bit of flair to your top.
Rnd 24 (INC): Rep rnd 23 but each SHELL will have 7 dc instead of 5.
Rnd 25 (INC): Rep rnd 24 but each SHELL will have 9 dc instead of 5.
Cut yarn and weave in ends.
Sleeves
Sizes XS (M)
With the right side of your work facing you, attach colour A to the first sc next under the arm. You will skip the sts under arm in order to create a more fitted sleeve. This will create a hole in the underarm that you will need to close by sewing it up together at the end of your work.
Rnd 1: 3 ch (count as 1st dc), 4 dc in same st, miss 2 dc, 1 sc in next dc, [miss 2 dc, SHELL in next sc, miss 2 dc, 1 sc in next dc] rep the steps between [...] 7 (9) times in total, miss 2 dc, sl st to 3rd ch from initial 3 ch. 8 (10) SHELLS in total.
Rnd 2: Move with sl st to 3rd dc from SHELL, 1 ch, 1 sc in same st, miss 2 dc, SHELL in next sc, miss 2 dc, 1 sc in next dc, miss 2 dc, SHELL in next sc rep from to until the end of the rnd, miss 2 dc, sl st to 1st sc from rnd. 8 (10) SHELLS in total.
Rnd 3: Rep rnd 1. 8 (10) SHELLS in total.
Rnd 4: Rep rnd 2. 8 (10) SHELLS in total.
Cut yarn and weave in ends. Using the invisible seaming technique or mattress stitch, sew the underarm.
Sizes S (L) XL (XXL)
With the right side of your work facing you, attach colour A to the third dc of the first SHELL next under the arm.
Rnd 1: 1 ch, 1 sc in same st, miss 2 dc, SHELL in next sc, miss 2 dc, 1 sc in next dc, rep from to 8 (10) 11 (12) times in total, miss 2 dc, SHELL in 2nd of underarm 3 ch, sl st to 1st sc from rnd. 9 (11) 12 (13) SHELLS in total.
Rnd 2: 3 ch (count as 1st dc), 4 dc in same st, miss 2 dc, 1 sc in next dc, [miss 2 dc, SHELL in next sc, miss 2 dc, 1 sc in next dc] rep the steps between [...] 8 (10) 11 (12) times in total, miss 2 dc, sl st to 3rd ch from initial 3 ch. 9 (11) 12 (13) SHELLS in total.
Rnd 3: Move with sl st to 3rd dc from SHELL, 1 ch, 1 sc in same st, miss 2 dc, SHELL in next sc, miss 2 dc, 1 sc in next dc, miss 2 dc, SHELL in next sc rep from to until the end of the rnd, miss 2 dc, sl st to 1st sc from rnd. 9 (11) 12 (13) SHELLS in total.
Rnd 4: Rep rnd 2. 9 (11) 12 (13) SHELLS in total.
Cut yarn and weave in ends.
RAISING THE BACK NECK
To raise the back-neck for a more comfortable fit, you will work a few rows of sc on the initial foundation round in between the corner spaces on the back of your top. You are going to work four back-and-forth rows that begin and end with sl sts. You will notice there is no chain 1 to start off each row, except for Row 1. This is intentional to help the first and last st blend nicely with the foundation round for a more discreet look.
With the RS of your work facing you, and working on the BACK panel of your top, attach color A to sc on top of the right corner space, 1 ch. You will be working towards the other corner space on the back of the top.
With 5 mm crochet hook.
Row 1: *1 sc in same st where yarn was attached, 1 sc in each sc until you reach the sc on top of the next corner space, 1 sl st in next 2 sc, turn.
Row 2: Miss 2 sl sts, 1 sc into each sc from Row 1, 1 sc in next sc, 1 sl st in next st, turn.
Row 3: Miss 2 sts (sl st and sc from previous row), 1 sc into each sc, 1 sl st in next 2 sc, turn.
Row 4: Miss 2 sl sts, 1 sc into each sc, 1 sc in next sc, 1 sl st in next st, turn.
Change to 4 mm crochet hook. Working in rounds.
Rnd 5: Miss 2 sts (sl st and sc from previous row), 1 sc into each sc available from the neckline, sl st to 1st sc from round.
OPTIONAL ROUND
Work this extra round of decreases if you would like to make the neckline closer.
Rnd 6: 1 ch, 1 sc in same st, [1 sc2tog, 1 sc] rep the steps between [...] until the end of the round, sl st to 1st sc of rnd.
Rnd 7: 1 sc into each sc. Cut yarn and weave in ends.

Flowers Appliques for the neckline- Optional
To make the flowers, use the same yarn as the top for a matching look, or choose different leftover yarns to add a pop of color around the neckline. Simply crochet each flower separately, then attach them evenly along the neckline for a decorative finish.
With your favorite yarn and crochet hook,
Start with a magic ring.
Rnd 1: 2 ch (do not count as a st) 12 dc into the ring, sl st to 1st dc from rnd. 12 dc in total.
Rnd 2: 4 ch, 4 tr in next dc, 4 ch, sl st in next dc, 4 ch rep from to 6 times in total, sl st to 1st dc from previous rnd. Cut yarn leaving a long tail to sew the flowers onto the top.

🌺🌺🌺🌺
Well That Was Fun! What's Next?
📌 PIN THIS POST - Don't lose this project; save it to your Pinterest crochet board so you can quickly come back to it again.
💌 SHARE - Share your yarn choice, in-progress, or finished projects on Facebook or Instagram and use the hashtag #leoneladiy
🥂 JOIN - Join our small community on Facebook: Dublin Bay Crochet