

Granny Square Sunflower Blanket- Free Crochet Pattern
Learn how to crochet a sunflower blanket with this free pattern and step-by-step tutorial. The complete Sunny Days Blanket pattern is below or you can purchase the ad-free, printable PDF here.
Looking for a cozy, colorful project to make this season? This easy sunflower crochet blanket pattern is beginner-friendly, portable, and perfect for adding a handmade touch to your fall décor.

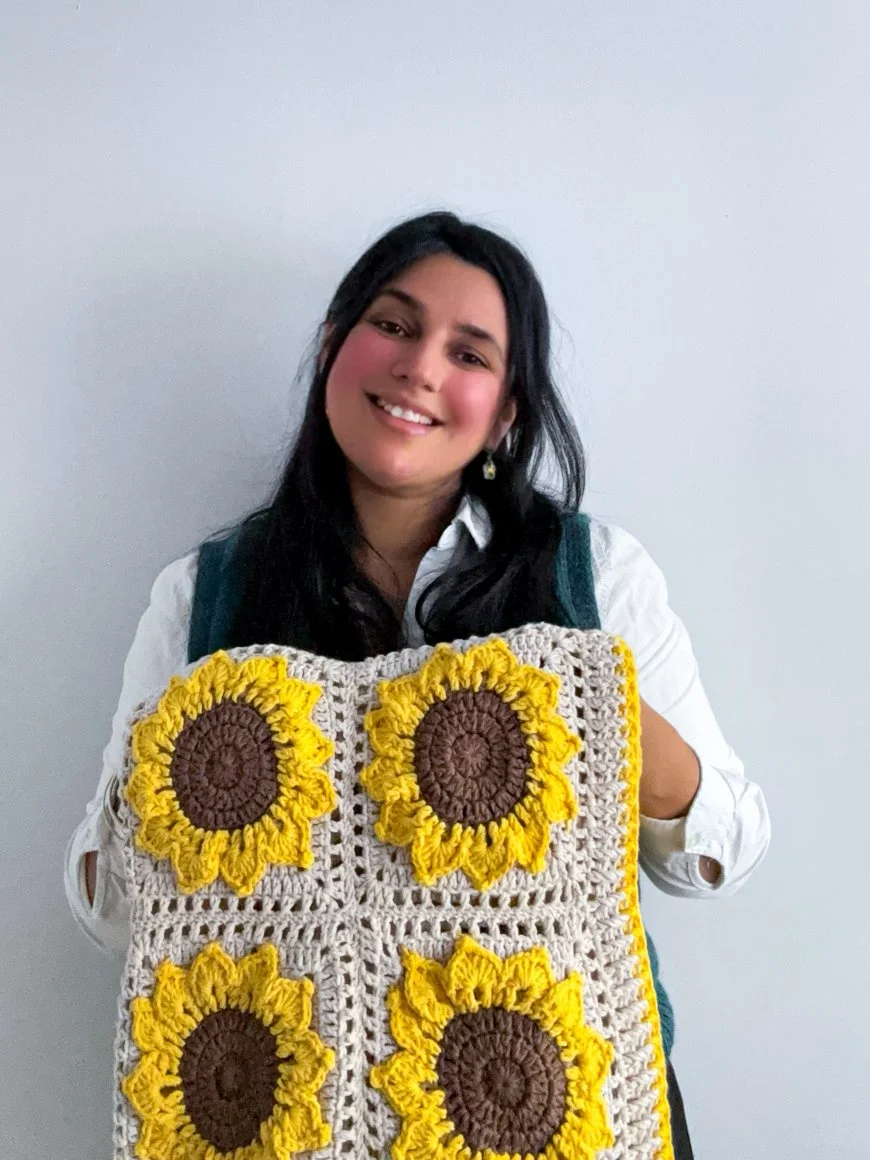
The Sunflower Granny Square Blanket is a simple yet stunning project that combines classic granny squares with vibrant sunflower motifs. Made with 100% cotton yarn, this blanket is designed to last—it won’t pill or go fluffy like acrylic yarn, and it stays crisp and fresh after washing. That makes it both durable and practical, ideal for everyday use.
With its rich sunflower tones, this blanket is especially fitting for fall and Thanksgiving décor. It brings warmth, color, and a touch of seasonal charm to your home. Because it’s worked in squares, it’s also a great take-along crochet project—easy to pack up and work on wherever you are.

Versatile Motifs
You don’t have to stop at the blanket—each sunflower motif can stand alone as a beautiful little project on its own. Worked in the round, the center mimics the rich texture of a sunflower’s seeds, surrounded by layered petals that give the design depth and dimension. On their own, these sunflowers make perfect drink coasters, table decorations, or even seasonal appliqués that you can sew onto bags, pillows, or clothing for a cheerful touch.
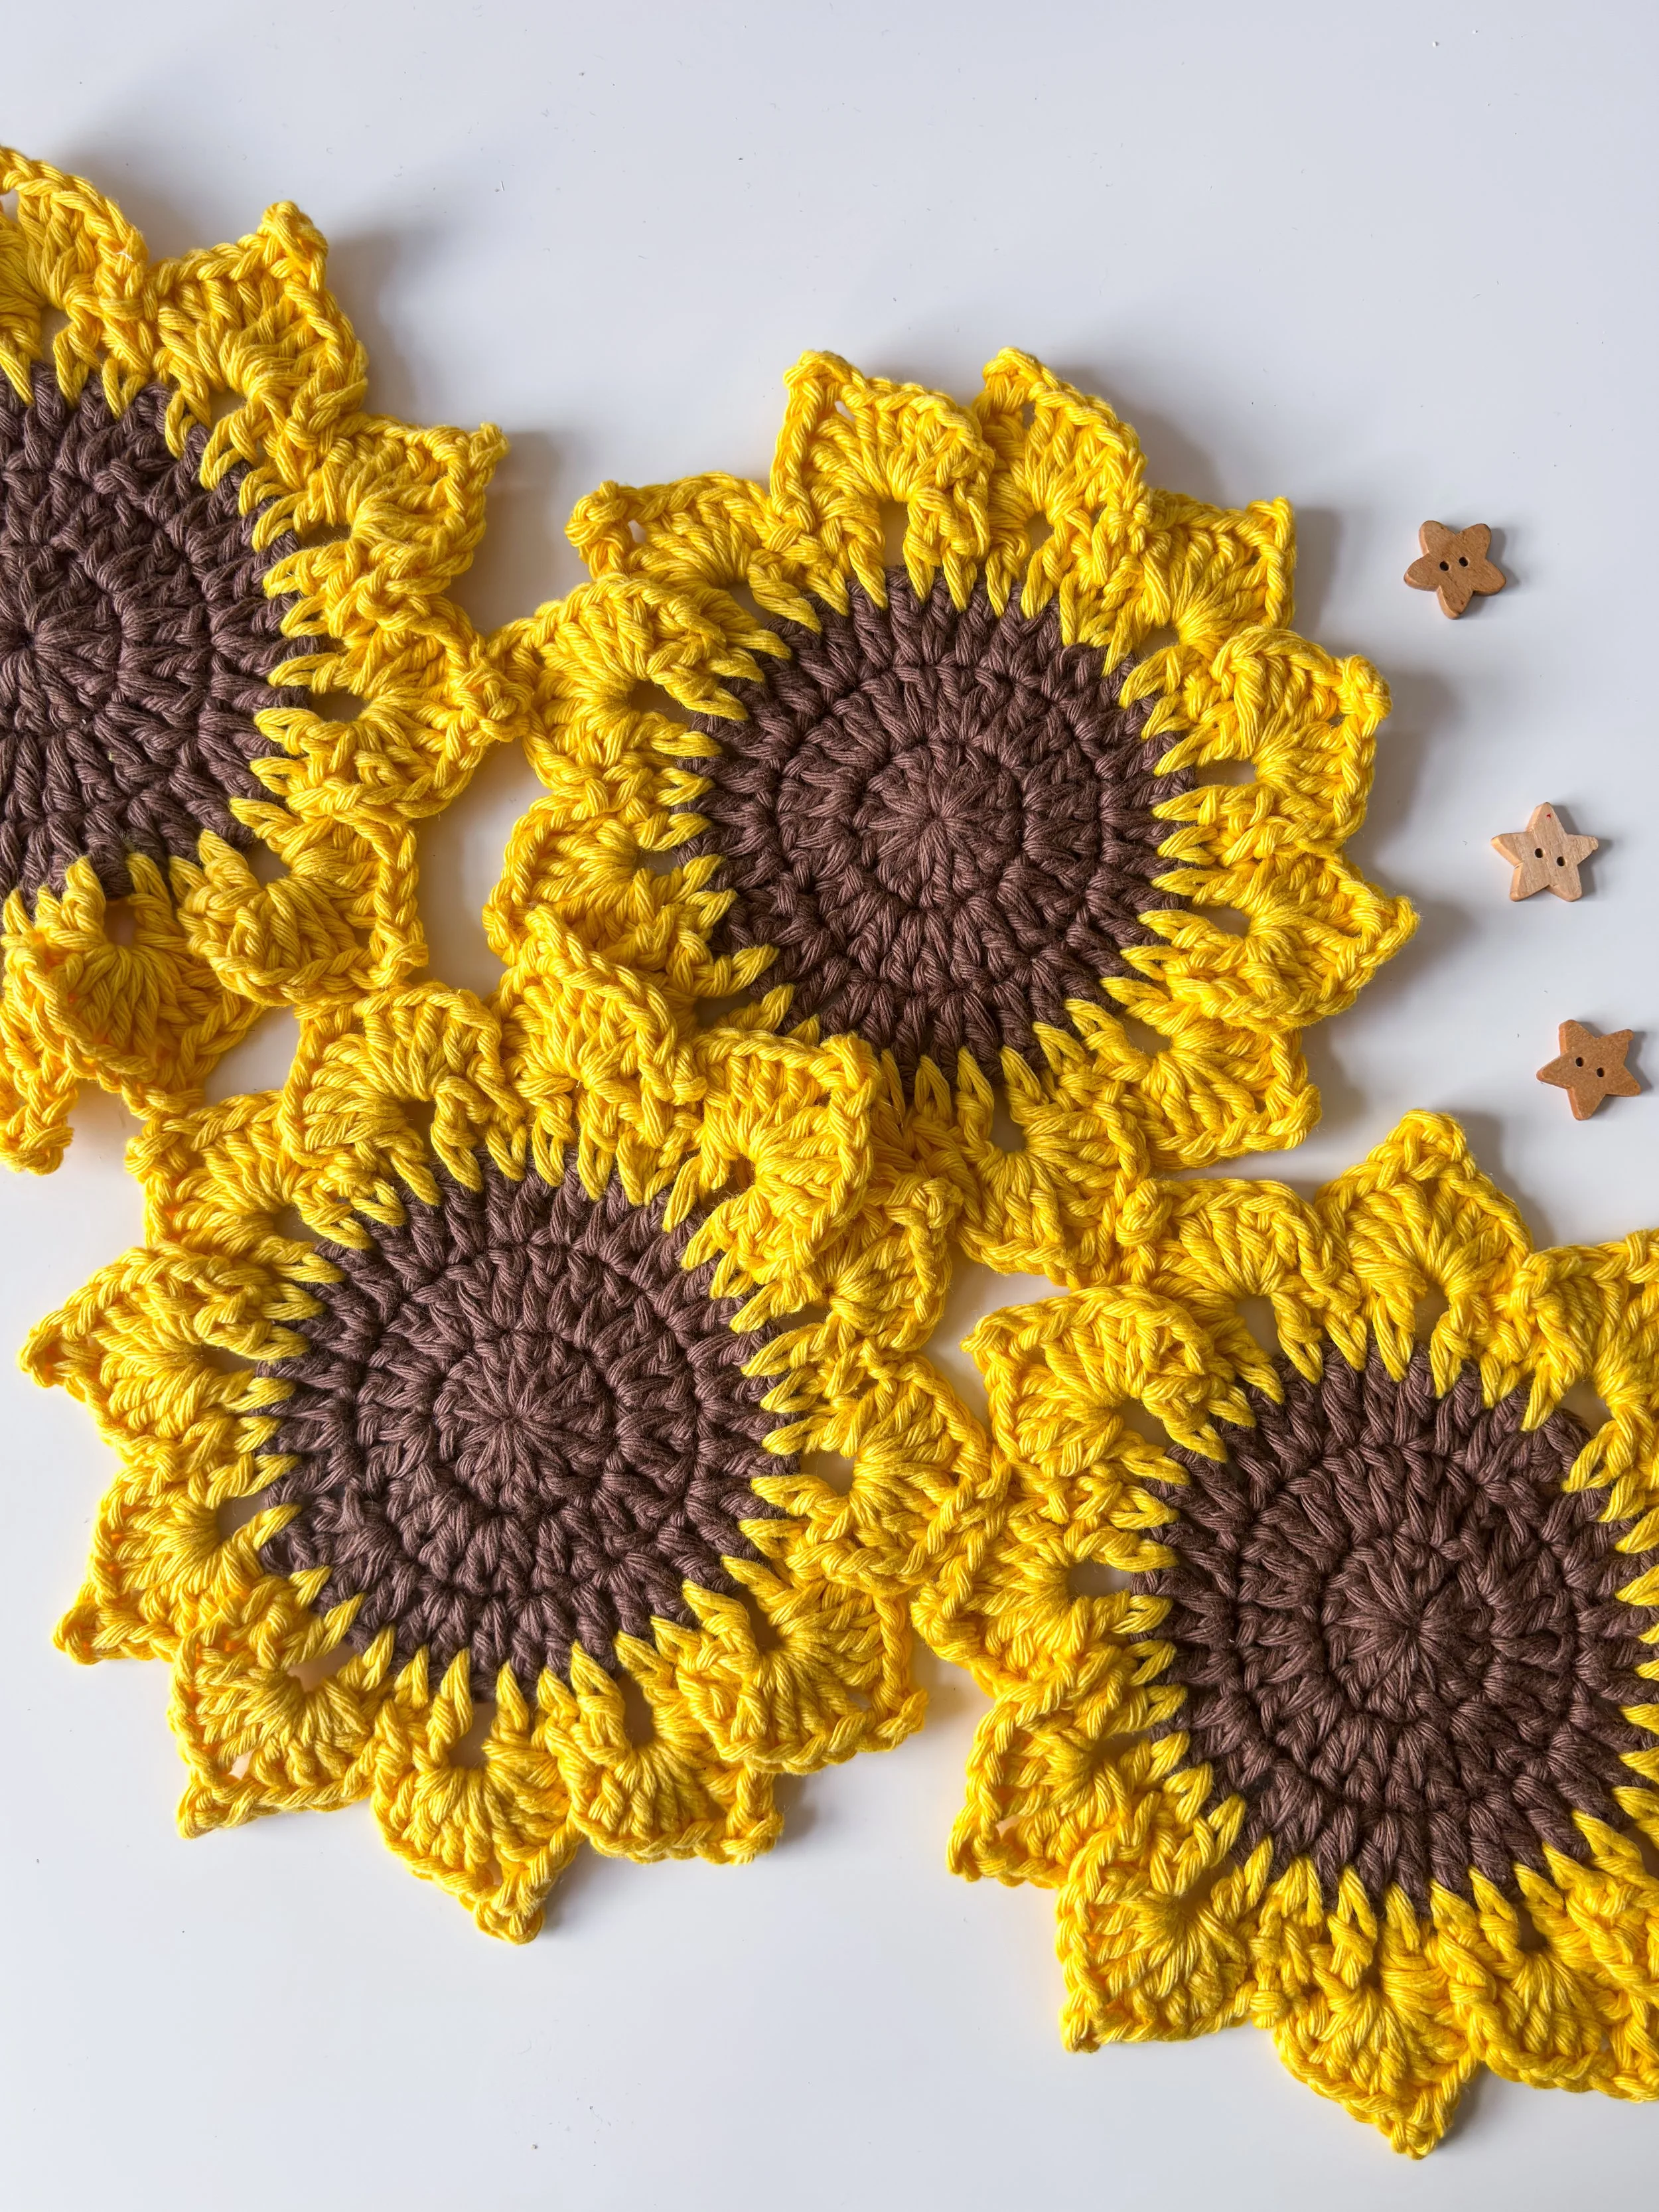
Because they’re quick to make and use very little yarn, they’re also a great scrap-busting project. You can experiment with different color combinations—try traditional yellows and browns for a realistic sunflower look, or play with bold, modern colors for a fun twist.
You’ll find the free step-by-step sunflower pattern here on my blog, complete with detailed instructions and photos, so you can try making a few sunflowers before turning them into granny squares for the blanket.
Yarn Substitutions
While this blanket is designed in 100% cotton yarn for durability and a crisp finish, you can easily substitute other worsted weight yarns such as acrylic or wool. Acrylic offers a soft and budget-friendly option, while wool adds natural warmth and coziness
Keep in mind that your yarn choice will affect the final size of the blanket. If you use a thinner yarn (like DK or sport weight), you’ll need to make more sunflower squares to reach the same finished size. If you use a chunky yarn, your squares will work up larger, so you’ll need fewer motifs to complete the blanket.
Here are some popular yarn options to consider:
Cotton: Lily Sugar’n Cream, Paintbox Cotton Aran, Drops Paris
Acrylic: Red Heart Super Saver, Caron One Pound, Stylecraft Special Aran
Wool / Wool Blends: Cascade 220, Lion Brand Wool-Ease, Drops Nepal
This flexibility makes the sunflower granny square blanket a truly versatile project—you can adjust it to your budget, your stash, and the finished look you want.
Permissions + Copyright:
Please do not publish or share this pattern as your own. You may make items to sell with this pattern. In exchange, please link back this post. Do NOT use our photos as your own sales photos.
Materials
You will need:
Any WORSTED or ARAN weight yarn (I used Rainbow 8/8 by Hobbii;
100 % cotton; 1.76 oz (50 g)= 82 yd (75 m)
*Brown (007) - color A - 4 balls
* Sunny Yellow (055) - color B- 8 balls
*Nude (003)- color C- 10 balls
4.5 mm crochet hook or size needed to obtain gauge
Tapestry needle
Scissors and Measuring Tape
TENSION:
Each square measures 20 x 20 cm// 7.87 x 7.87 inches.
Are you looking for another Fall pattern?
Skill Level:
This is an easy crochet pattern making it perfect and suitable for beginners who want to practice crocheting in the round and learn new stitches like Front and Back Post Double Crochet.
SIZE
There are instructions to make one size only but you can add extra squares to make your blanket bigger. If you do add more squares, you will need extra yarn than the pattern calls for.
MEASUREMENTS
Width without border: 80 cm
Length without border: 100 cm
Width with border: 90 cm
Length with border: 110 cm
CONSTRUCTION
You will first make the sunflower and then you will work around it to create the square. Each full square is worked in 9 rounds, 5 rounds for the sunflower and 4 rounds for the actual square. After making the squares, you will join them together and will work five rounds to make the border. You can work extra rounds for the border to make it thicker.
As an extra step, you can use color B (yellow) to sew the petals of the sunflowers to the square. This will prevent them from curling and creating a flat blanket.
Start here...
Make 20 sunflowers squares.
With colour A and 4.5 mm crochet hook
Start by making a magic ring
Working in rounds:
Rnd 1: 2 ch (do not count as a st here and throughout) work 12 dc into the ring, pull the yarn tail to close the ring and sl st to 1st dc of rnd. 12 dc
Rnd 2: (INC) 2 ch, 2 dc in each dc around, sl st to 1st dc from round. 24 dc
Rnd 3: 2 ch, 2 dc in same st where initial 2 ch begins, 1 dc in next dc, [2 dc in next dc, 1 dc in next dc] rep the steps [...] 11 times in total, sl st to 1st dc from round. 36 dc
For this round you will be working on the front loop of each stitch only (FLO).
Rnd 4: Attach color B to the FLO of any dc from previous rnd, 1 ch (does not count as a st), 1 sc in same dc, 1 ch, *(1 dc in next dc, 2 ch, 1 dc in next dc), 1 ch, 1 sc in next dc, 1 ch * repeat from * to * 11 times in total, (1 dc in next dc, 2 ch, 1 dc in next dc), 1 ch, sl st to 1st sc of rnd. 12 groups of 2 dc separated by 2 ch, and 12 sc
Rnd 5: 1 ch (do not count as a st), 1 sc in same space, 1 ch, *(4 dc, picot, 4 dc) in 2ch-sp from previous rnd, 1 ch, 1 sc in sc from previous rnd, 1 ch * repeat from * to * 11 times in total, (4 dc, picot, 4 dc) in last 2ch-sp, 1 ch, sl st to 1st sc of rnd. Fasten off and weave in ends. 12 petals in total (4 dc, 1 picot, 4 dc)= 1 petal
MAKING THE SQUARES
On this round, you will be working on the leftover loop- back loop only- of the double crochets worked on round 3. These are the stitches at the back of your work, left unworked when working the petals on round 4.
Attach color C to any leftover loop from the dc worked on rnd 3.
Rnd 6: 4 ch (count as a 1st tr), 1 tr in same st, 1 dc in next 8 dc, *(2 tr, 2 ch, 2 tr) in next dc, 1 dc in next 8 dc* rep from * to * 3 times in total, 2 tr in 1st dc, 1 ch, 1 sc in 4th ch from initial 4 ch to close the round. 12 sts on each side (8 dc and 4 tr on each side) and 4 corner spaces.
Rnd 7: 3 ch (count as 1st dc), 1 dc in same corner space, 1 dc in each dc until next corner space, *(2 dc, 2 ch, 2 dc) in next 2ch-sp from corner, 1 dc in each dc until next corner space* rep from * to * 3 times in total, 2 dc in last 2ch-sp from corner, 1 ch, 1 sc in 3rd ch from initial 3 ch to close the round. 16 dc on each side and 4 corner spaces.
Rnd 8: Repeat rnd 7. 20 dc on each side and 4 corner spaces.
Rnd 9: 3 ch (count as 1st dc), 1 dc in same corner space, *[1 ch, miss 1 dc, 1 dc in next dc]* rep the steps between [...] until next corner space**, (2 dc, 2 ch, 2 dc) in next 2ch-sp from corner space* rep from * to * 3 more times, finishing last rep at **, 2 dc in last 2ch-sp from corner space, 2 ch, sl st to 3rd ch from initial 3 ch to close the rnd. Cut yarn and weave in ends.
Making the Blanket
How to join the squares?
Using color C and a whip stitch, join the squares together following the Blanket Layout diagram. Begin with the horizontal joins:
Create one long column by joining 4 squares side by side.
Follow the black dots in the diagram, connecting squares 1 through 3.
Repeat this process until you have 4 columns in total.
Next, complete the vertical joins:
Attach the columns together along the purple dot vertical lines shown in the diagram.
Repeat this step 4 times until all columns are joined and the blanket is complete.
Attach color C to any corner space along one of the long sides of the blanket.
With 4.50 mm crochet hook and working on the round.
Rnd 1: 3 ch (count as 1st dc here and throughout), *[1 dc in next 24 sts, 1 dc in next ch-sp, 1 dc in join between two squares, 1 dc in next ch-sp] 4 times in total, 1 dc in next 24 sts, (2 dc, 2 ch, 2 dc) in next 2ch-sp from corner, rotate your work to continue working on the short side of the blanket:
[1 dc in next 24 sts, 1 dc in next ch-sp, 1 dc in join between two squares, 1 dc in next ch-sp] 3 times in total, 1 dc in next 24 sts**, (2 dc, 2 ch, 2 dc) in next 2ch-sp from corner*, rep from * to * 2 more times, finishing last rep at **, 2 dc in last 2ch-sp from corner space, 1 ch, 1 sc in 3rd ch from initial 3 ch to close the rnd.
Rnd 2: 3 ch, 1 dc in same corner space, *[1 FPDC in next dc, 1 BPDC in next dc] rep the steps between [...] until next corner space**, (2 dc, 2 ch, 2 dc) in next corner space* rep from * to * 3 more times, finishing last rep at **, 2 dc in last 2ch-sp from corner space, 1 ch, 1 sc in 3rd ch from initial 3 ch to close the rnd.
Rnd 3 and 4: Repeat rnd 2. Cut color C and attach color B to any 2ch-sp from corner space.
Rnd 5: 3 ch, 1 dc in same corner space, *[1 FPDC in next dc, 1 BPDC in next dc] rep the steps between [...] until next corner space**, (2 dc, 2 ch, 2 dc) in next corner space* rep from * to * 3 more times, finishing last rep at **, 2 dc in last 2ch-sp from corner space, 2 ch, sl st to 3rd ch from initial 3 ch to close the rnd. Cut yarn and weave in ends.

🍂🍁🌾🍂🍁🌾
Well That Was Fun! What's Next?
📌 PIN THIS POST - Don't lose this project; save it to your Pinterest crochet board so you can quickly come back to it again.
💌 SHARE - Share your yarn choice, in-progress, or finished projects on Facebook or Instagram and use the hashtag #leoneladiy
🥂 JOIN - Join our small community on Facebook: Dublin Bay Crochet
